Summary: ◀▼
You can create groups to organize users by language, skill, or team structure, then use them in assignments and filters for dashboards and conversations. Groups help you focus on the right reviewers, reviewees, assignees, and participants, with results updating when members change. Note that groups made here don’t sync back to Support.
This article describes how to create groups in Zendesk QA. Groups allow you to organize users based on characteristics such as language or skill set, or based on your organizational structure. Then you can use groups in assignments and to filter dashboards and conversations.
Groups created in Zendesk QA don’t sync with Zendesk Support; syncing happens only from Zendesk Support to Zendesk QA.
Creating a group
Admins, workspace managers, and leads can create and manage groups in Zendesk QA.
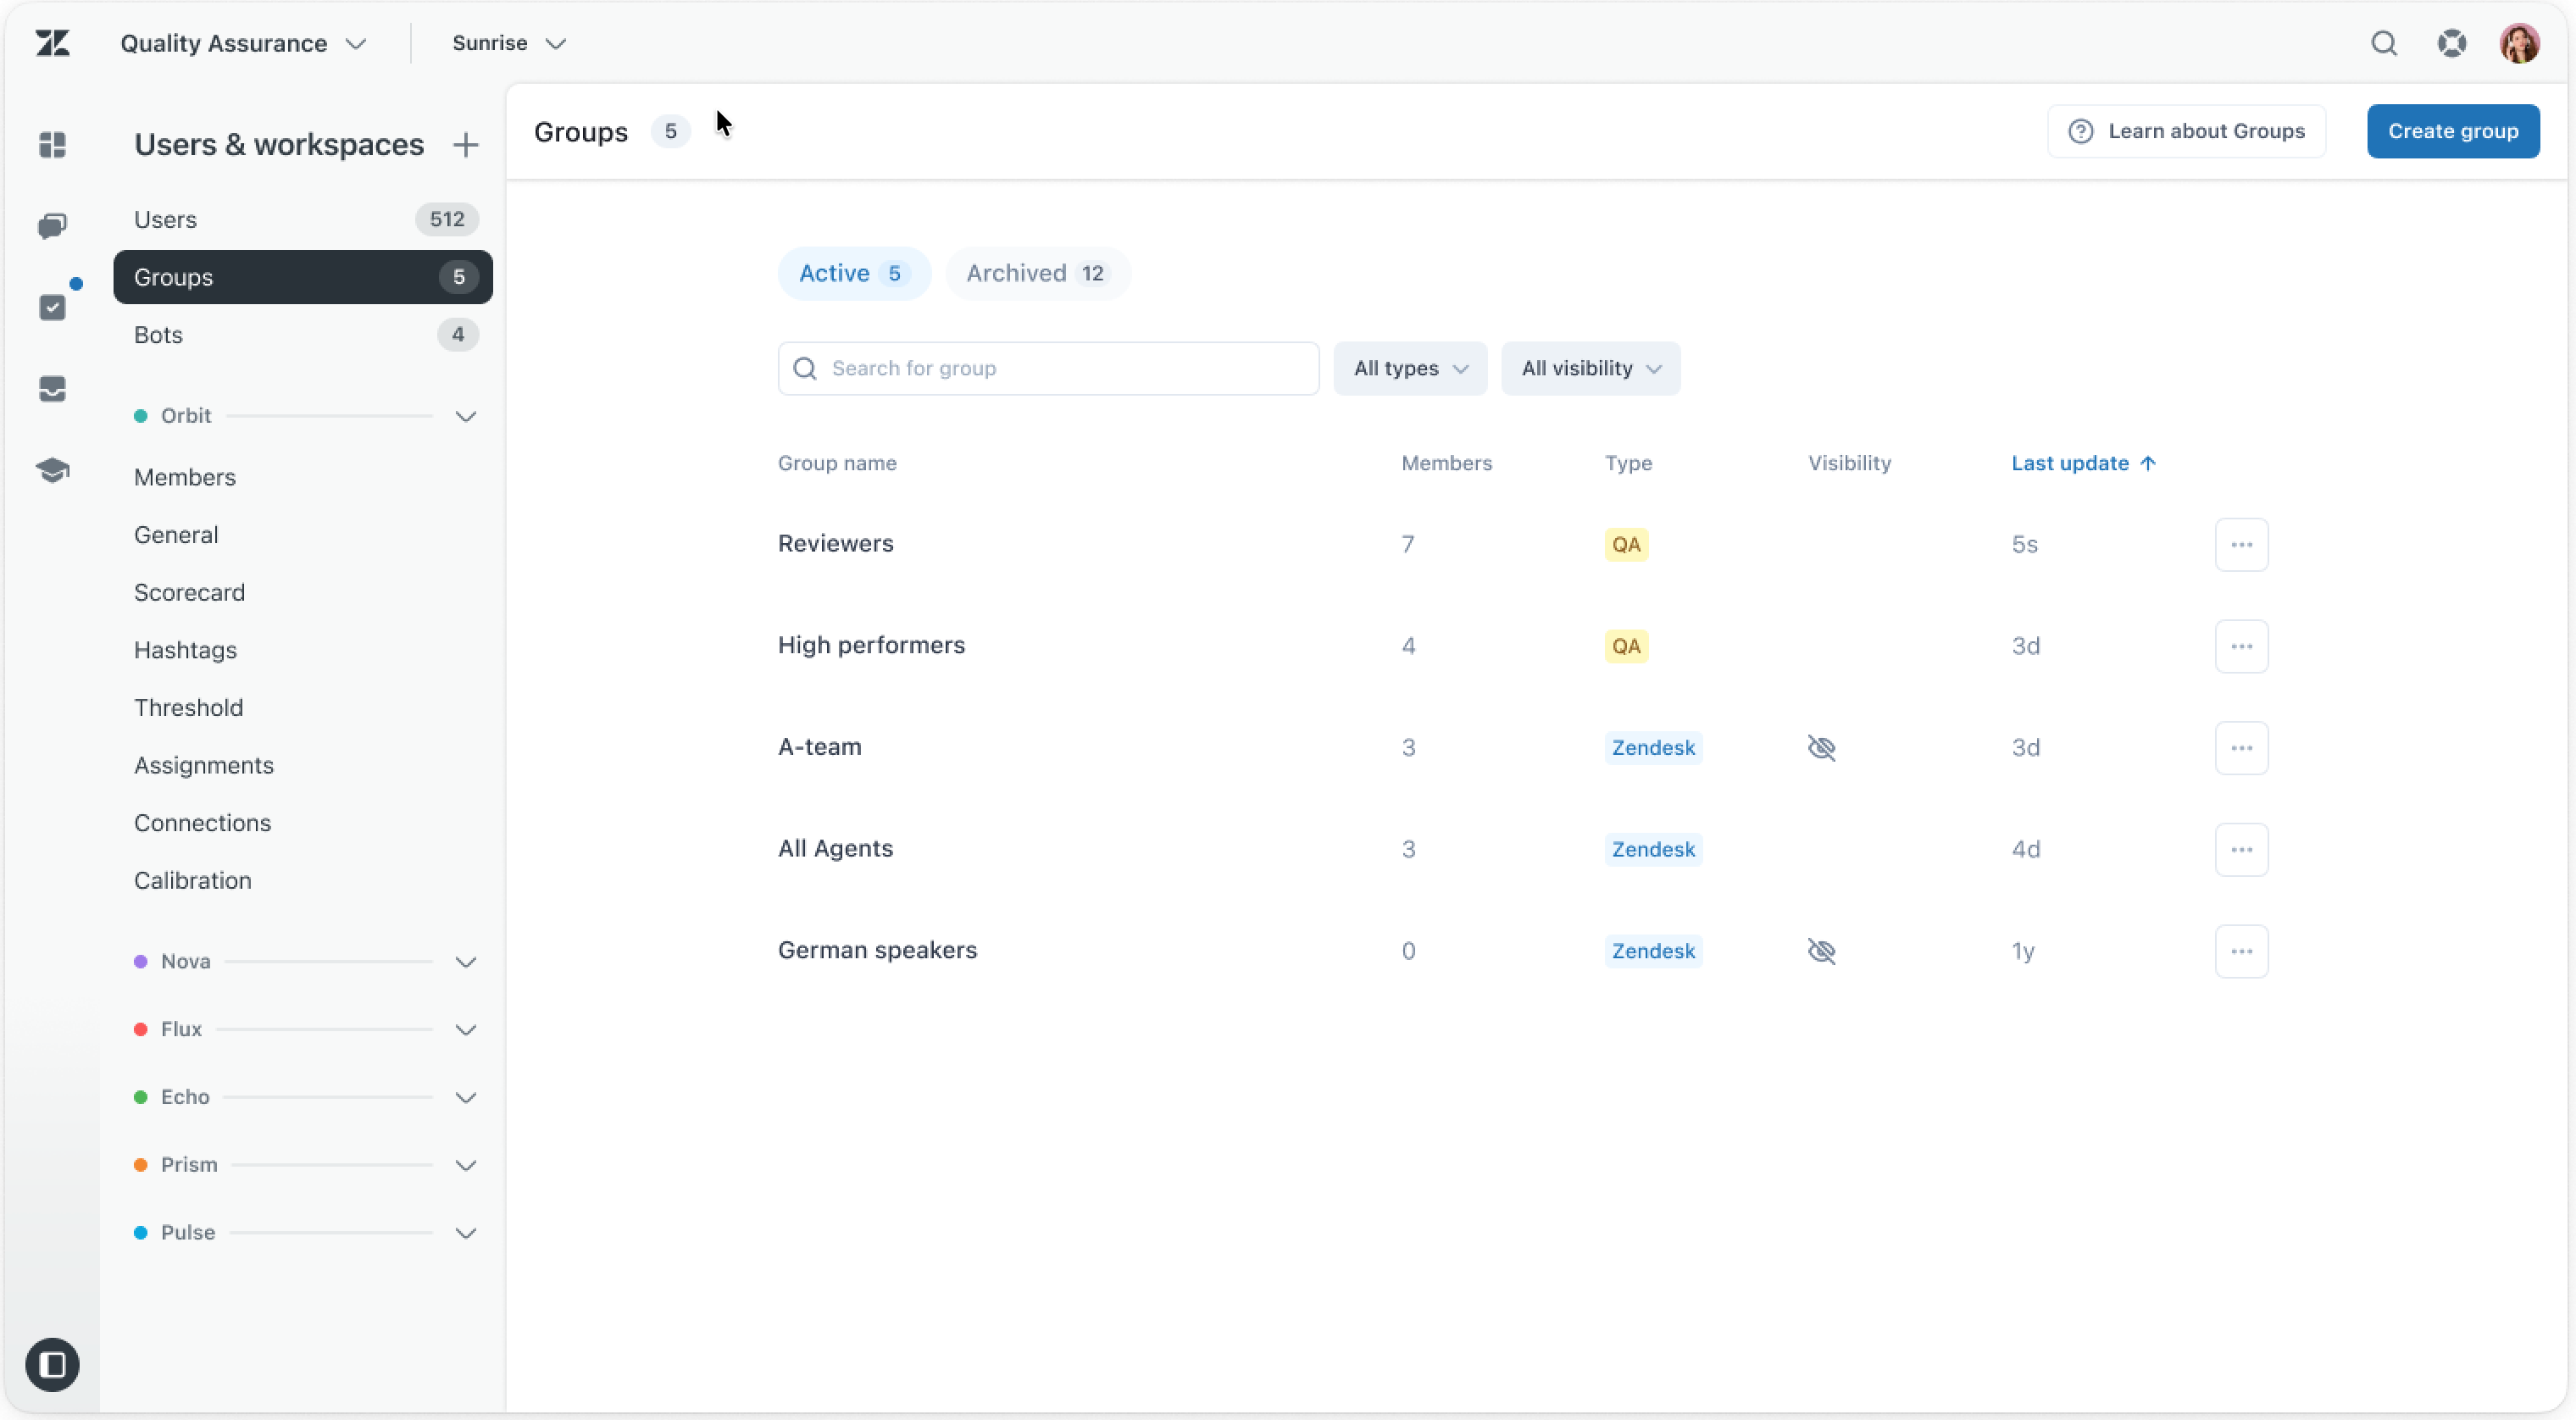
- In Quality assurance, click your profile icon in the top-right corner, then select Users, bots, and workspaces.
- In the side menu, click Groups.
- Click Create group.
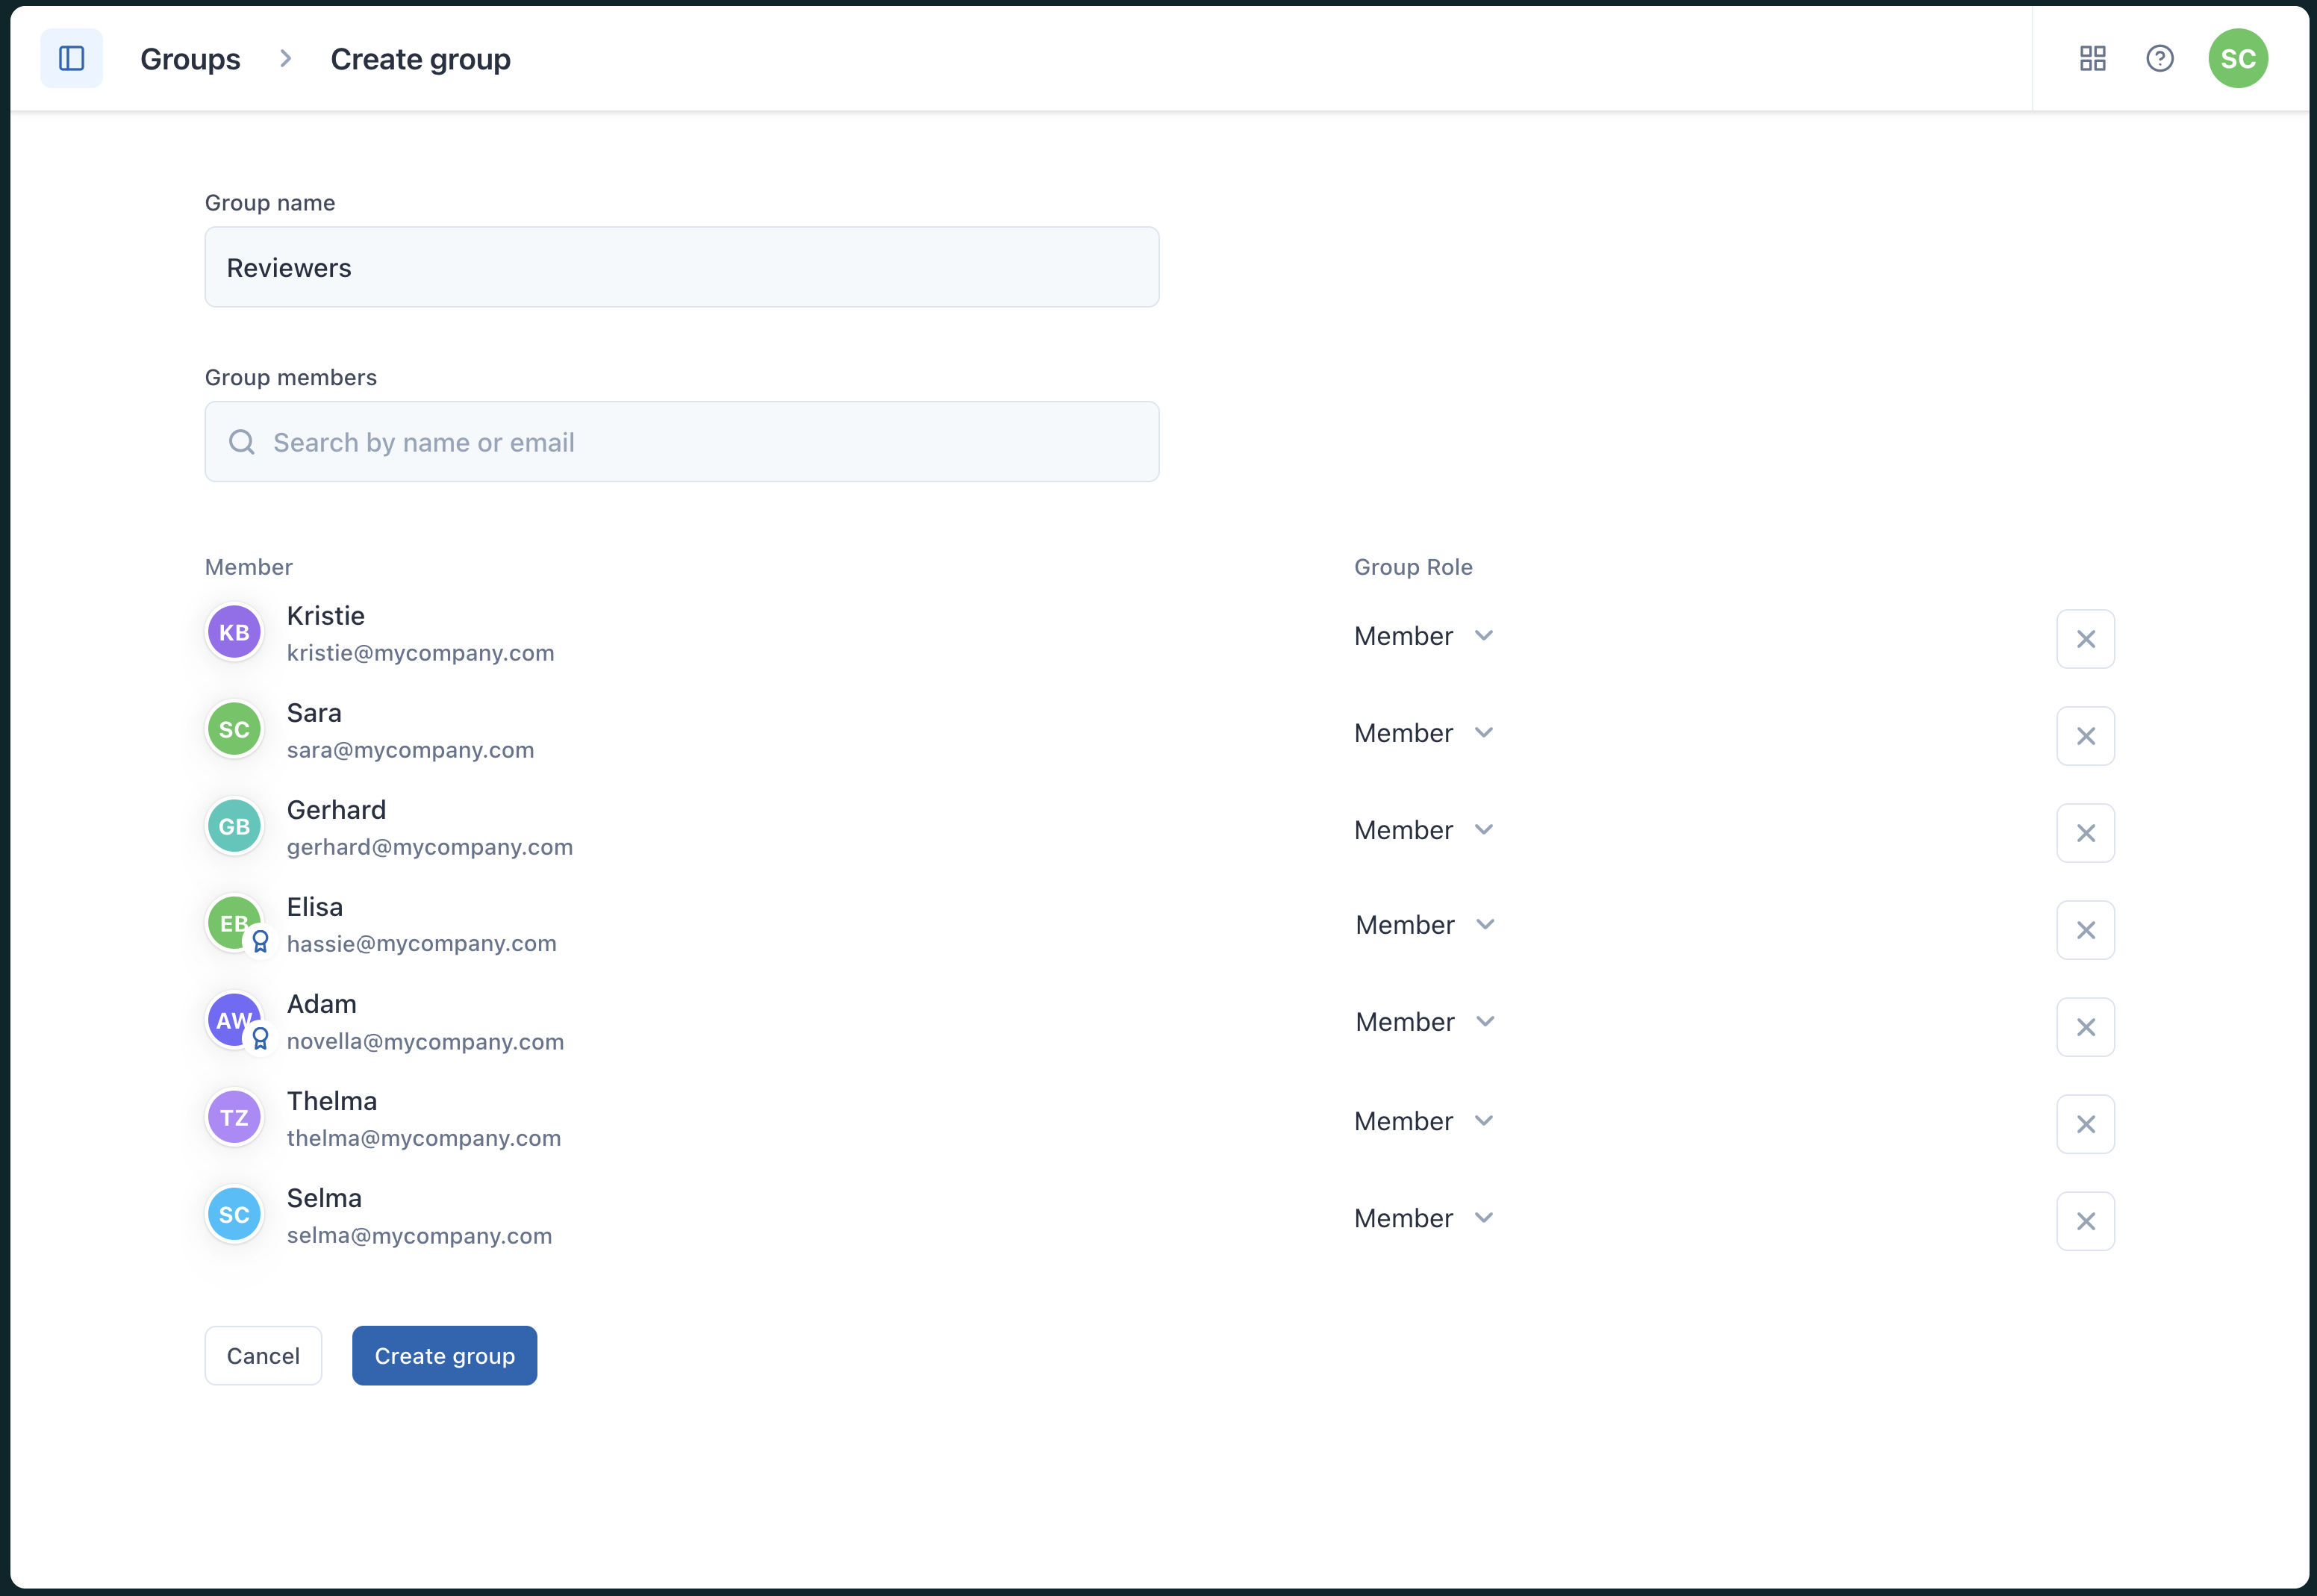
- Enter a unique Group name.
- Add Group members.
Start typing the user’s name or email to autocomplete and select them from the drop-down menu.
- Click Create group.
Using groups to filter dashboards
You can use the group dashboard filter to focus on the activity or performance of a specific subset of team members. When you also filter by workspaces, the group filter limits the options to reviewees and reviewers in those groups and workspaces.

Using groups to filter conversations
You can use groups in conversation filters to display only conversations related to a specific subset of team members. When users are added to a group or removed from it, the filter results update automatically.
- Assignee
- Participant
- Public participant
- Reviewee
- Reviewed by

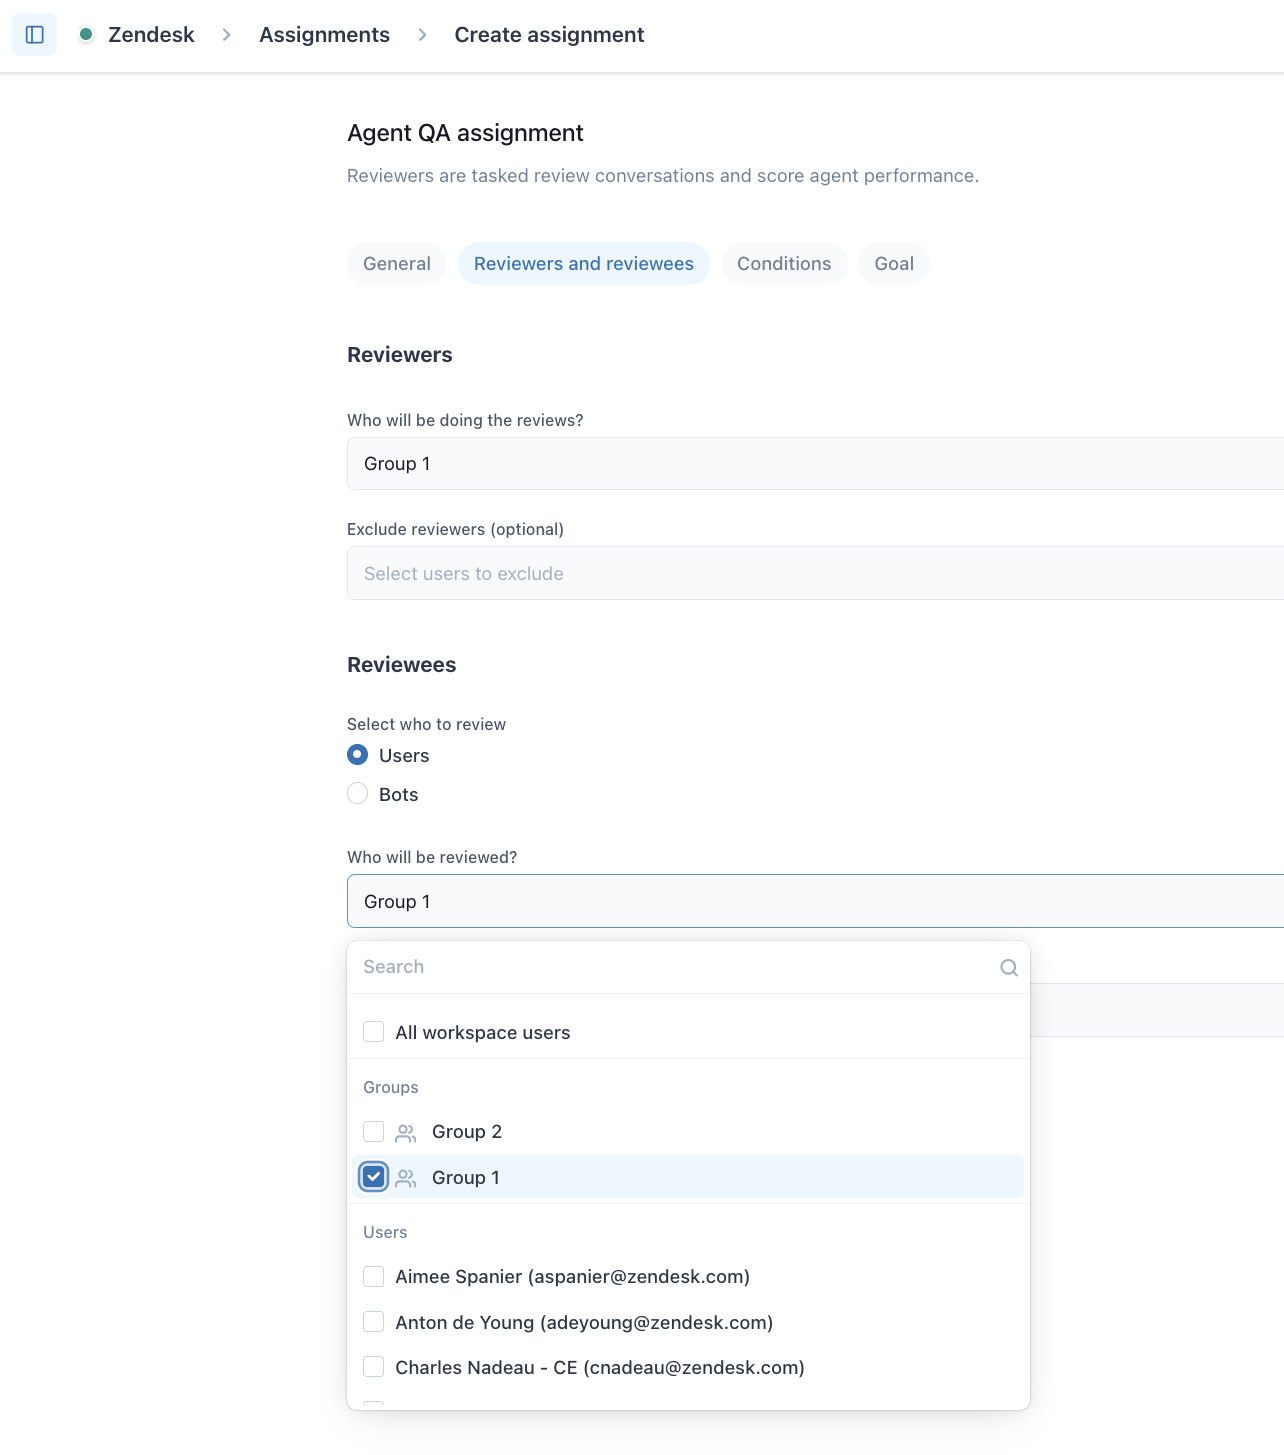
Using groups in assignments
When creating assignments, you can select groups as the reviewers or reviewees instead of selecting users individually. When selecting groups as the reviewers or reviewees, you can include or exclude individual users within the groups.
You can also use groups in assignment conditions to specify the right kind of conversations for reviewing. Assignment conditions include the same options that are available in conversation filters.