Verified AI summary ◀▼
The live chat-to-messaging migration wizard helps you transition your chat triggers to messaging triggers. You'll review and activate migrated triggers, ensuring they perform as expected. Access the migration review page to manage triggers, including activating, deleting, or updating them in bulk. Stay informed about triggers that couldn't be migrated and take necessary actions to recreate them manually.
As part of the assisted live chat-to-messaging migration process, your Zendesk Chat triggers will be converted to messaging triggers. This process includes the option to review and triage your migrated triggers before activating them.
This article provides an introduction to the Chat triggers migration review page in Admin Center, and additional resources for understanding and working with messaging triggers.
For more information on the migration process, see About the live chat-to-messaging migration wizard.
This article includes the following topics:
About trigger migration
When you migrate from live chat to messaging, Zendesk uses AI to assess how each Chat trigger is used in your live chat configuration and recreates them as Support triggers, messaging triggers, or proactive messages. Our AI is constantly learning and improving its performance, so while most triggers are recreated accurately, we recommend that you review all migrated triggers to make sure they will perform as expected. See Changes to your Chat triggers when migrating from Chat to messaging for more information.
Chat triggers migrated to messaging triggers will keep their activation status when they are migrated. If the original Chat trigger was active in your live chat configuration, it will be active after migration. When you configure and launch your messaging channel, active messaging triggers will run when their conditions are met. You can access messaging triggers at Admin Center > Objects and Rules > Business rules > Messaging triggers. See the following articles for more information on messaging triggers:
- Accessing messaging triggers
- About the standard messaging triggers
- Messaging triggers conditions and actions reference
Chat triggers migrated to Support triggers will be deactivated after migration, regardless of their activation status before migration. You will need to review and manually activate the new Support triggers before they run when their conditions are met in the messaging environment. You can access these triggers at Admin Center > Objects and Rules > Business rules > Triggers. See the following articles for more information:
- About triggers and how they work
- About the standard ticket triggers
- Ticket triggers conditions and actions reference
Chat triggers designed to proactively contact visitors will become proactive messages. These triggers will be deactivated after migration, regardless of their activation status before migration. You can access proactive messages at Admin Center > Channels > Messaging > Proactive messages. See the following articles for more information:
Chat triggers that can’t be migrated can be viewed in the Not migrated tab of the Chat triggers migration review page. Reasons for unsuccessful migration include:
- The trigger contains functionality that is not available in the messaging environment.
- Something went wrong with the trigger’s migration, and you will need to re-create the trigger manually.
Viewing and using the Chat triggers migration review page
After the migration is complete, you can access the Chat triggers migration review page, where you can view the list of migrated triggers and update them as needed.
Viewing the Chat triggers migration review page
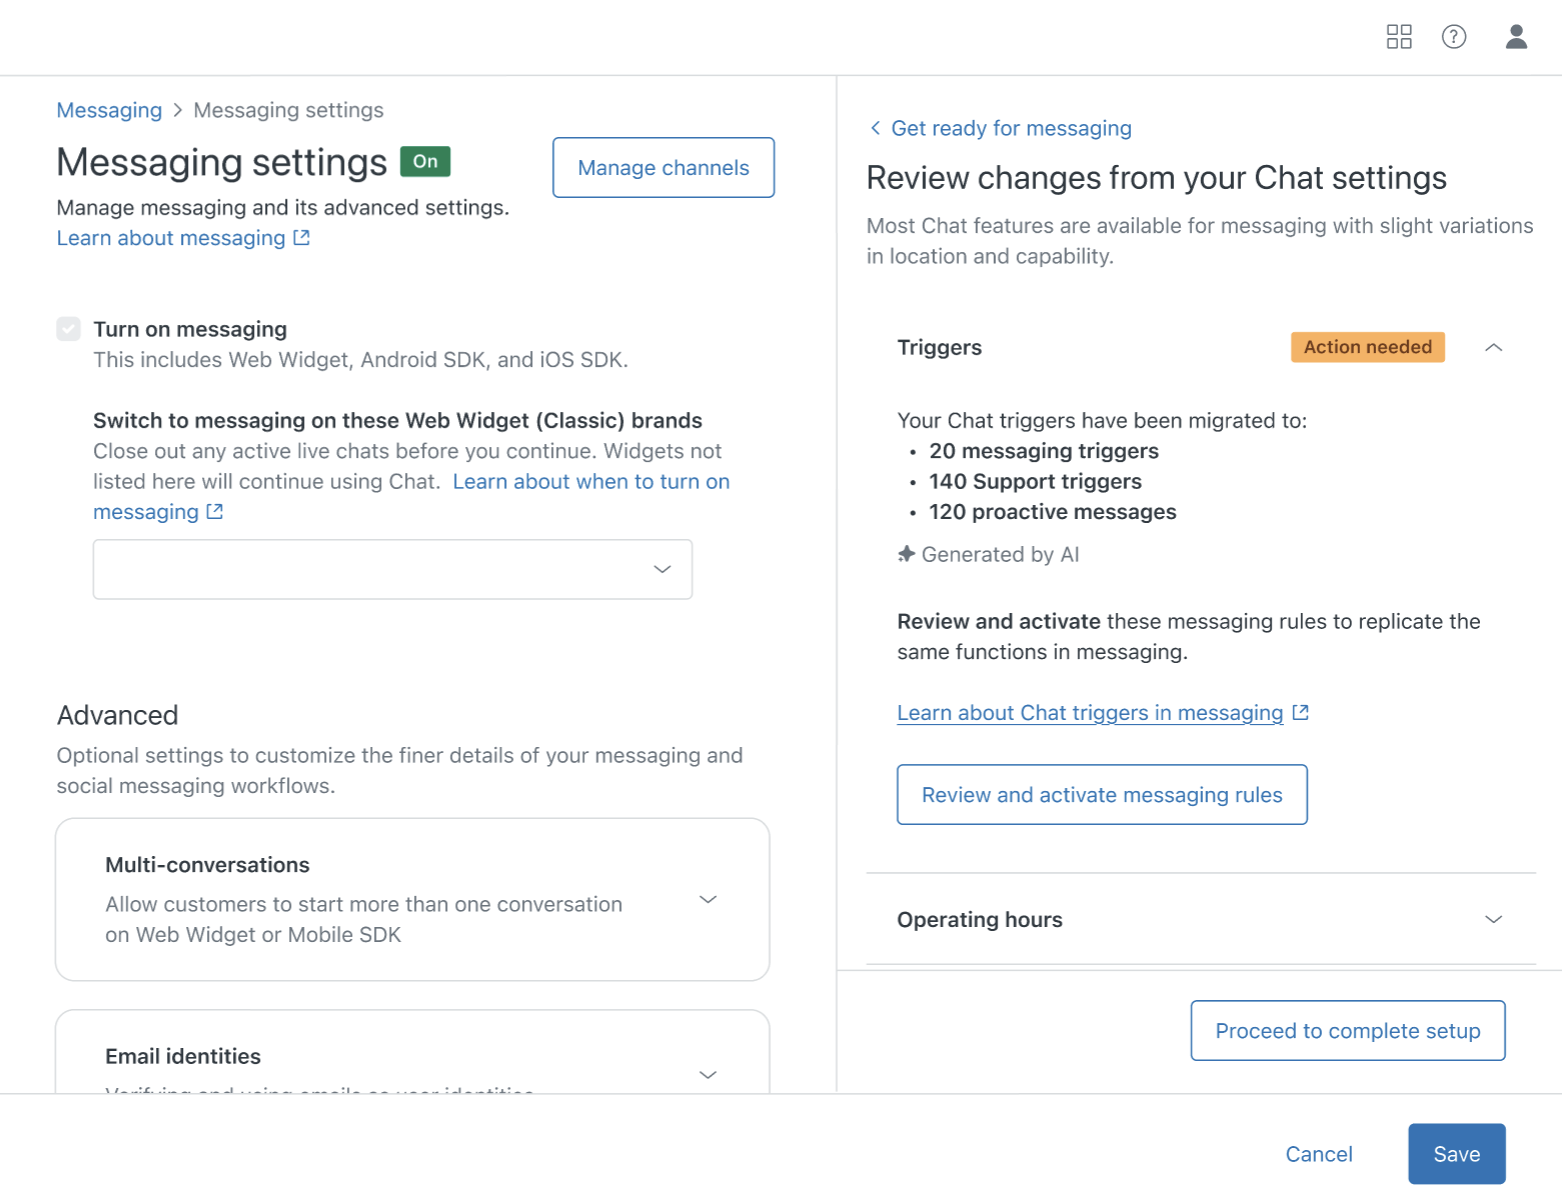
You can access the Chat triggers migration review page from the Messaging settings page in Admin Center.
To access the Chat triggers migration review page
-
In Admin Center, click
 Channels in the sidebar, then select Messaging and social > Messaging.
-
On the Messaging page, click Manage settings.
-
Click Review and activate messaging rules to view the Chat triggers migration review page.
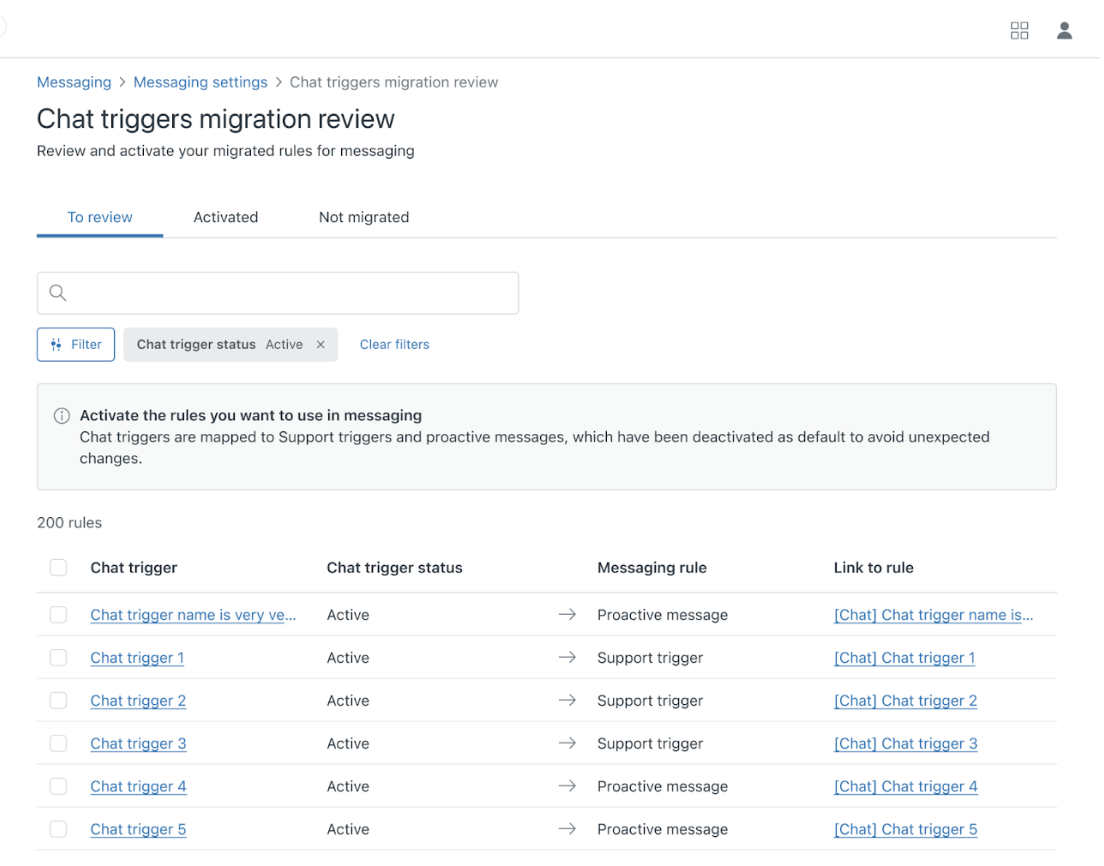
This page includes the following tabs:
- To review lists all migrated Chat triggers and the messaging rules they are mapped to. From this tab, you can review, activate, and delete the migrated rules. You can (and should) review these triggers before creating and launching a messaging channel.
- Activated lists the migrated triggers that are now active. These include Chat triggers that were active when the migration occurred and became messaging triggers, as well as migrated triggers you activated manually.
- Not migrated lists the Chat triggers that could not be mapped to Support triggers, messaging triggers, or proactive messages, and were not included in the migration.
The trigger lists on these tabs include the following columns:
- Chat trigger, a link to the original Chat trigger on the Chat dashboard. Clicking this link opens the Chat trigger in a new tab.
- Chat trigger status, the original Chat trigger’s status when the migration occurred. Note that if you change a trigger’s status after migration, this column will still reflect the status at the point of migration.
- Messaging rule (To review and Activated tabs only), whether the original trigger was converted to a Support trigger, messaging trigger, or a proactive message.
- Link to rule (To review and Activated tabs only), a link to the messaging version of the trigger on the Support triggers page, the Messaging triggers page, or the Proactive messages page. Clicking this link opens the Support trigger or proactive message in a new tab.
Deleting migrated triggers
To delete a migrated trigger
- In the To Review tab, click the selection box next to the active trigger you want to deactivate.
- At the bottom of the list, click Delete, then confirm your selection.
Updating triggers in bulk
To update the status of triggers in bulk
- In the To Review tab, select the triggers you want to update:
-
Click the Chat trigger selection box at the top of the triggers list to select all triggers in the list, OR
Filter the list to display only the triggers you want to update, then click the selection box at the top of the list.
- At the bottom of the list, click Activate or Delete, then confirm your selection.
Filtering the triggers lists
You can filter the triggers lists on all tabs by Chat trigger status.
To filter the triggers list
- In any tab, click the Filter button.
-
In the filter options panel, select the status on which you want to filter the list.
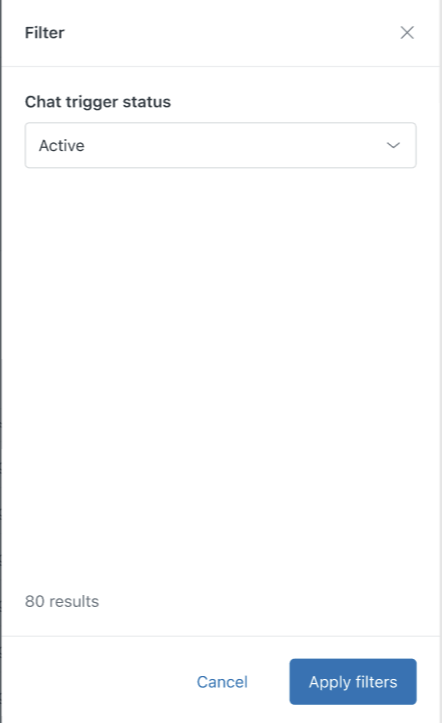
- Click Apply filters.
Activating migrated triggers
By default, migrated Chat triggers maintain the status – active or inactive – applied to them when the migration occurred. You can activate the new versions of the migrated Chat triggers in the To review tab.
Activated triggers will run when you configure and launch your messaging channel.
To activate a migrated trigger
- In the To Review tab, click the selection box next to the inactive triggers you want to activate.
- At the bottom of the list, click Activate.
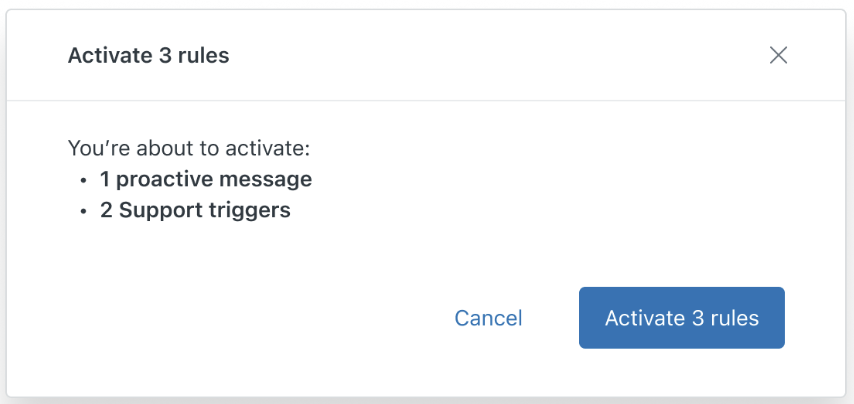
-
On the confirmation page, click Activate [X] rules.