If you've set up your Zendesk to support multiple brands, you might want to ensure that proper branding is included in all of your outgoing messages. That might mean the voice of any statements made, different contact information or brand names, or different logos, colors, and other styling.
First, you need to remove any branded information from your email template, because you get only one email template per account. Next, use triggers to create specially branded notifications.
Removing branded content from your email templates
Your email template is the skeleton of every email sent by your Zendesk to your customers. It's the structure used to determine where the major parts of each notification are located. The default Zendesk email template doesn't show any of your brand's information, so if you want to be sure you aren't putting any branded info in notifications, you can always revert to the default template.
However, you can also add content to it. Some Zendesk accounts have created custom footers, added logos, or provided helpful text. This is obviously an advantage of an email template. But, if you are supporting multiple brands, you shouldn't put brand-specific information in the template, because that email template is applied to all messages, regardless of brand.
There are a few things to think about if you've set up an additional brand. Take a glance at your email template to see if any of these apply to you:
- Colors -- You should avoid any colors that are specific to one of your brands. The default template colors are all in gray, so they should be fairly neutral.
- The Footer -- Many people remove the Zendesk branded footer from the email template -- {{footer}}{{footer_link}} -- which is fine. However, if you've added your own footer, make sure it doesn't have brand names, phone numbers, or messaging that's inappropriate for some brands.
To edit your email templates, see Customizing your email templates.
Branding your emails using triggers
Even though your template can't be branded, you can use triggers to send different messages depending on the brand of the ticket. Triggers enable you to use conditions to create a fully branded suite of messages.
In this example, we'll set up a notify requester of comment update trigger and differentiate it for two brands.
To set up your branded triggers
- In Admin Center, click the Objects and rules icon (
 ) in the sidebar, then select Business rules > Triggers.
 - Find the Notify requester of comment update trigger, then click Edit.
- Add the condition [Brand] [Is] [Acme], then click Save.

- Hover your mouse over the trigger you just modified, then click Clone.
- Change your cloned trigger so that the brand condition matches your second brand, in this case Brand-X, then click Save.
At this point you have two functional triggers with nothing different about them. From here you can differentiate the brands. - Edit the Notify trigger action in your new trigger and update the message with whatever needs to be changed for your brand.
For example, this is the message that Acme sends to customers when they receive a notification of an updated ticket:
An update was made to your ticket by one of our Acme support reps. You can reply to this email if you need more information or reach during business hours by phone at +1-888-123-4567.
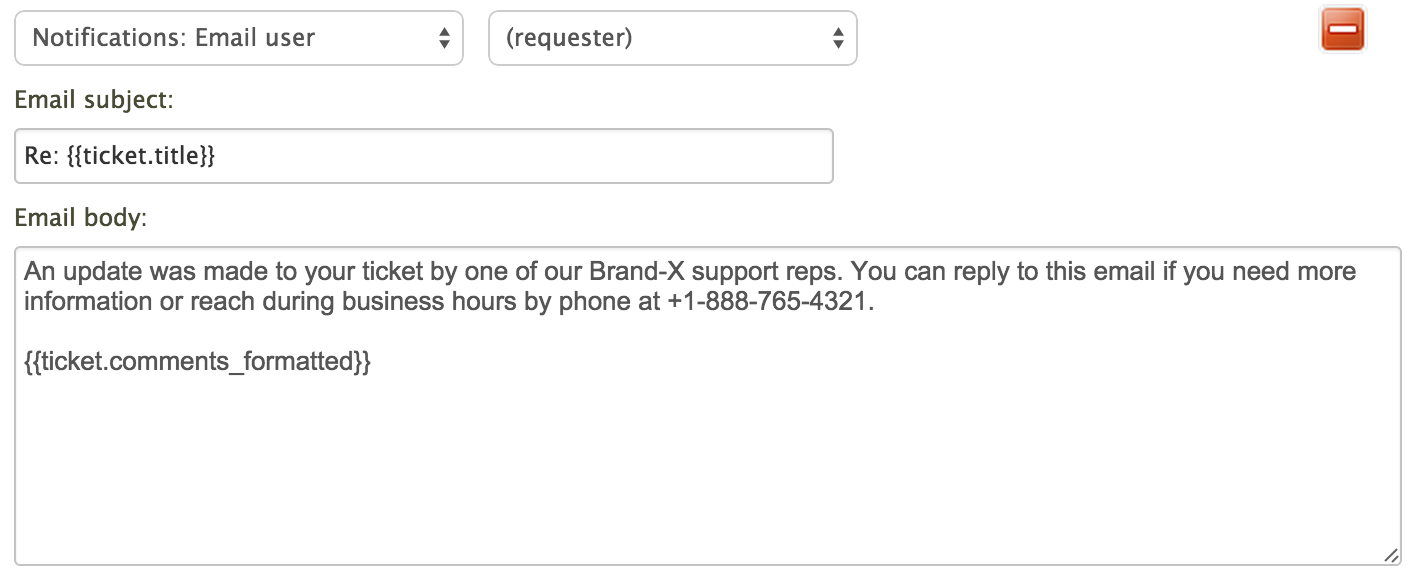
To support Brand-X, you can update the phone number and brand name to create an alternate version:
An update was made to your ticket by one of our Brand-X support reps. You can reply to this email if you need more information or reach during business hours by phone at +1-888-765-4321.
You can go a step further by adding logos using HTML. For example, Acme can add their corporate logo to their emails. Because they've created multiple triggers, they can now brand each one differently.

You can use HTML to do more than just add logos, too. With this method You can impart the correct voice, wording, information, and styles into each of your outgoing messages.
Fixing ticket links for multiple Help Centers
When you create multiple brands, you have the option to create multiple Help Centers. Each Help Center enables your customers access to the tickets they've opened and are CC'd on for that brand only. This means that each Help Center has its own unique branding, and, when viewing tickets, the branding and the ticket match.
One downside to this is it means that if a brand has no Help Center (an option you can choose if you prefer to do email only support for a brand) then email notifications with ticket links will be broken.
You can use the process above to correct for this. If you choose to have one or more brands with a Help Center and one or more without a Help Center, you need to create separate triggers for these brands. Include the {{ticket.url}} placeholder in the former but not in the latter.
For example, here's a trigger for a brand with a Help Center.

And here's a trigger for a brand without a Help Center.
