After you create an AI agent, you can specify its default language and configure either automatic or custom translations for an improved customer experience. Using these settings, you can select a language for a single-language AI agent or create a multilingual AI agent.
You must be an admin to manage languages and translations for an AI agent.
This article contains the following topics:
Related articles:
Understanding language support in AI agents
Which language an AI agent uses to respond to a customer depends on the channel.
Language support on messaging channels
For standard responses and messages sent as part of an answer flow (which is legacy functionality), the AI agent uses the language set in the Language section of the Settings tab. By default, this is the same as your account’s default language. This language can be any of the languages listed here.
For AI-generated replies, the language the AI agent uses depends on the language the customer types their message in:
- If the customer’s language is supported by the AI model, the AI agent replies in that language.
- If the customer’s language isn't supported by the AI model, the AI agent replies in the account’s default language.
If the system can’t confidently detect the customer’s language, the AI agent replies in the previously successfully detected language within the same conversation, if available. If not available, the AI agent uses the same language as the standard responses.
Language support on email, API, and web form channels
The AI agent generates a response using relevant help center content in the same language as the language set in the requester's profile. If no relevant content exists in the requester's language, the AI agent uses content in either of the following languages, evaluated in order:
- The parent language of the requester's language. For example, if the requester's language is British English (en-gb), but no help center content exists in that language, the AI agent uses English (en).
- The AI agent's default language.
Configuring a default language for an AI agent
By default, your AI agent language is set to your account's default language, but you can change it if necessary.
For consistency and ease of comprehension, the AI agent’s default language should match the language used in its standard responses.
To configure a default language for an AI agent
- In Admin Center, click
 AI in the sidebar, then select AI agents > AI agents.
 - Click the AI agent you want to configure a default language for.
- Click the Settings tab.
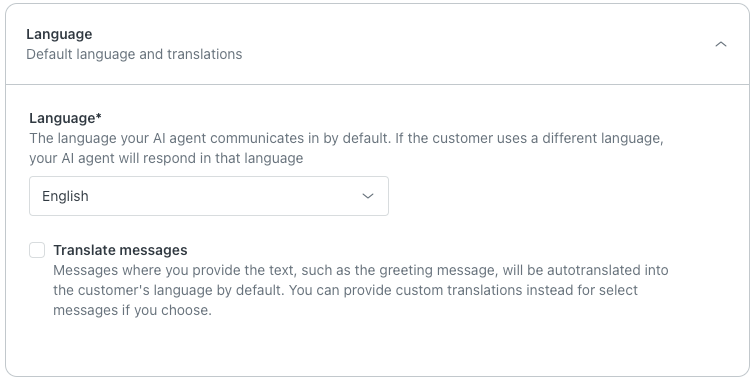
- Click the Language section to expand it.
- Use the drop-down menu to select your language.
Your changes are automatically saved, but updates to the AI agent’s default language won’t be presented to customers until you publish the AI agent.
Activating automatic translation for an AI agent
You can configure your AI agent to automatically translate its messages. This includes its standard responses and, if you had a draft or published AI agent as of February 2, 2025, the text elements in any answer steps, including AI agent messages, options, button text and links, carousel card titles, image descriptions, and variables.
The AI agent’s default language is used as the source language when translating text. The language the AI agent translates messages into depends on where the Web Widget is embedded. If the Web Widget is embedded in:
- A Zendesk help center, the AI agent uses the language provided by the help center itself.
- A website, the AI agent uses the end user’s browser language.
In either case, you need to add the language as a supported language when activating automatic translation, as described below.
Activating automatic translation in an AI agent does not impact text elements managed outside of the AI agent settings, such as help center articles. You can, however, use dynamic content to translate some of these elements in Zendesk Support. See Providing multiple language support with dynamic content.
To activate automatic translation
-
In Admin Center, click
AI in the sidebar, then select AI agents > AI agents.
- Click the AI agent you want to activate automatic translation for.
- Click the Settings tab.
- Click the Language section to expand it.
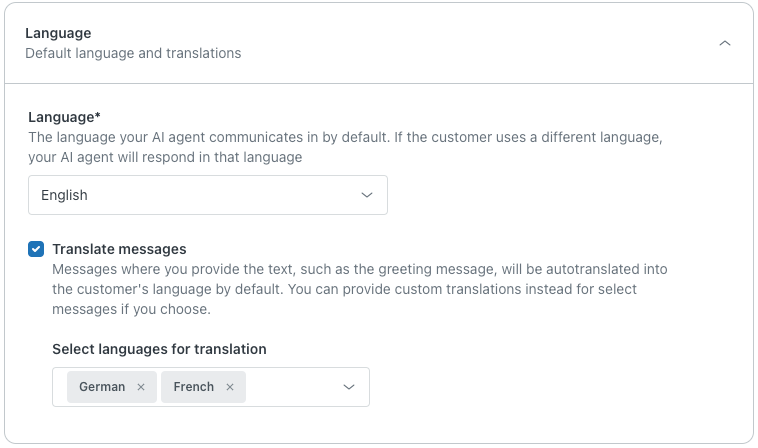
- Select Translate messages.
- Click Select languages for translation and select the languages
you want to include in the automatic translation process.
To filter the options, you can begin typing a language name.
Your changes are automatically saved, but updates to the AI agent’s automatic translation process won’t be presented to customers until you publish the AI agent.
Creating custom translations for AI agent messages
Custom message translations are manually written versions of the text in the message fields of an AI agent’s standard responses and, if you had a draft or published AI agent as of February 2, 2025, AI agent messages in answer steps. Custom translations aren’t available for other automatically translated text elements (such as option or button text).
To customize a message in a particular language, that language must be:
- Included in the automatic translation settings
- Added to the list of available languages in Zendesk Support
Custom-translated AI agent messages are sent to end users based on their detected language. If a message field does not have a customized translation in the end user’s detected language and that language is included in the automatic translation settings, it will be autotranslated.
This section contains the following topics:
Creating custom translations for AI agent standard responses
You can create custom translations for the text in an AI agent’s standard responses.
To create a custom translation for a standard AI agent response
- In Admin Center, click
AI in the sidebar, then select AI agents > AI agents.
- Click the AI agent you want to create custom translations for.
- Click the Messaging behavior tab.
- Click the standard response you want to create a custom translation for.
- Under the message text, click Manage
translations.

- Click the pencil icon for the language you want to
customize, then enter the custom text.

Repeat this step for additional languages if needed.
- Click Done.
Your changes are automatically saved, but updates to the AI agent’s custom translations won’t be presented to customers until you publish the AI agent.
Creating custom translations for AI agent messages in answer steps (Legacy)
You can create custom translations for the AI agent messages in an answer step.
To create a custom translation for an answer
- In Admin Center, click
AI in the sidebar, then select AI agents > AI agents.
- Click the AI agent you want to create custom translations for.
- Click the Answers tab.
- Select the answer you want to create a custom translation
for.
The bot builder opens.
- Click the AI agent message you want to create a custom
translation for.
You can’t create custom translations for other text elements, such as option or button text.
- Under the AI agent message, click Manage
translations.

- Click the pencil icon for the language you want to
customize, then enter the custom text.
Repeat this step for additional languages if needed.
- Click Done.
Your changes are automatically saved, but updates to the AI agent’s custom translations won’t be presented to customers until you publish the AI agent.