AI agents interact with customers on messaging and email channels to resolve issues without human intervention, freeing up your support team to spend more time on more complex issues.
You must be a client admin in the AI agents workspace to create an AI agent.
Related article:
Creating an AI agent
You can create an AI agent in the AI agents workspace. By default, all newly created AI agents use agentic AI, and this cannot be changed.
To create an AI agent
-
In the AI agents workspace, click
 AI agent management in the sidebar, then select Create AI
agent.
AI agent management in the sidebar, then select Create AI
agent.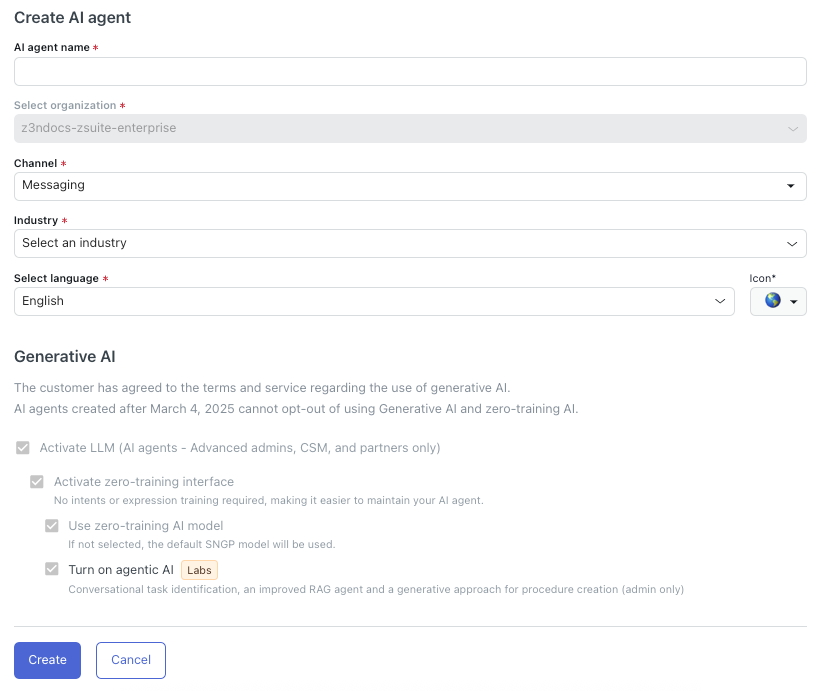
- In AI agent name, enter a descriptive name for your AI agent.
- In Channel, select either Messaging or Email, depending on what type of channels you want your AI agent to work for.
- In Industry, select one of the following options that best fits the
industry the AI agent will be used for:
- Airline
- Gaming
- Telecommunication
- E-Commerce
- Banking
-
Other
If your exact industry isn't available as an option, select the closest fit. This setting impacts benchmarks and other industry-related settings throughout your account.
- In Select language, select the language your AI agent should
use.Tip: You can add more supported languages later.
- In Icon, select an icon that should be associated with the language you selected.
- Click Create.
Your AI agent is created, but it won’t interact with your customers until you connect it to your chosen channels.