This guide shows you how to get familiar with your Zendesk trial account, helps you evaluate Zendesk features to see how they'll work for you, and provides guidelines on where to find more information. Follow the steps in this guide to get your trial account up and running. Each task typically takes less than 10 minutes to complete.
Use AI agents to automatically resolve customer issues
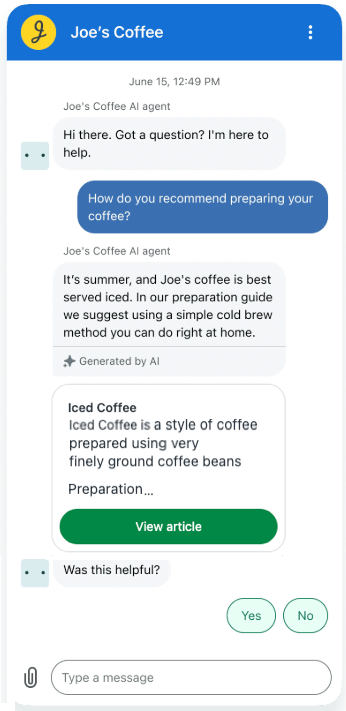
AI agents are the next generation of AI-powered bots that automate and resolve your customers’ issues across messaging, email, and web form channels. You can quickly create an AI agent that responds to your customers in a conversational manner using information sourced from your existing help center.

Plan it
If you have an active help center, AI agents deliver automated, AI-generated answers in response to customer requests, with information from your own trusted help center content.
Think about which channels you plan to offer and how you can use essential AI agents to provide instant answers. See Understanding everywhere you can use AI agents.
Try it
To help you get familiar with AI agents, Zendesk provides a setup wizard for AI agents. See Zendesk Suite trial: Add AI agents to automatically resolve questions. The setup wizard starts automatically when you open a new trial account. Alternatively, you can open Launchpad in Admin Center and click AI agents > Start.
Extend your support solution with apps and integrations
To improve agent efficiency, streamline your support workflows, and connect to the many other web applications and services you use everyday, you can extend your Zendesk Suite support solution by adding apps and integrations that you can find in the Zendesk Marketplace.
For example, if services such as Slack and Salesforce are essential for managing your business and customer data, you can add them to your Zendesk. There are hundreds of apps and integrations available in the marketplace. You can add apps and integrations to Support and Chat.
Plan it
First, see Using the Zendesk Marketplace for a brief introduction and a link to the marketplace. Then, review the apps that are available and determine which will help you best manage your customer support experience and solve tickets quickly and efficiently. You can add apps and integrations at any time, but some up front planning will help you determine how you're going to set up and launch your Zendesk support solution (see Launch guide for Zendesk Suite).
Try it
To get started in the Zendesk Marketplace and become familiar with the kind of functionality you can add to your Zendesk, follow these steps to install the Time Tracking app. This app, available for the Zendesk Suite Growth plan and above, automatically tracks the time agents spend on each of your Zendesk Support tickets, which will make managing your team’s performance and overall support operations easier.
To install the Time Tracking app
- Access the Time Tracking app in the marketplace.
- On the app details page, click Install.
- From the drop-down, choose the account you want to install the app to, then click Install.
- Read Setting up the Time Tracking app for information about quickly configuring and using the app.
Learn more
Customize your support solution with the Zendesk API
You also have the option of creating custom apps and integrations that extend the functionality of products within the Zendesk Suite. For example, a common use of the Zendesk API is to create a custom ticket form that creates tickets in Support. You can build your own apps.
Plan it
For a better understanding of how the Zendesk API can be used and what you might create with it, review Common tasks for the Zendesk APIs.
Try it
If you want to give the API a try, you can follow the steps in the Zendesk API quick start. This is a 10-minute tutorial that guides you through using the Zendesk API to create tickets.