Summary: ◀▼
You can view, edit, activate, deactivate, and delete rating categories used to assess customer conversations and calculate quality scores. Categories include system, manual, exact text-match, and AI prompt-based types. Managing these categories helps tailor evaluations, improve scoring accuracy, and maintain relevant insights for quality assurance and performance tracking in customer support.
Rating categories allow you to effectively assess customer conversations. Internal Quality Score (IQS) is calculated based on these categories, helping you evaluate and improve your customer support.
To help you get started, your account comes with a predefined default scorecard that includes autoscoring system categories and manual categories. Changes made to categories apply to future conversations only.
This article contains the following topics:
- Accessing your account's rating categories
- Editing manual and exact text-match categories
- Editing prompt-based AI insight categories
- Activating a category
- Deactivating a category
- Deleting a category
Related articles
Accessing your account's rating categories
Admins and account managers can view and manage categories.
To access your scorecard categories
- In Quality assurance, click your profile icon in the top-right corner.
- Click Settings (
 ).
). - In the sidebar under Account, click Scorecards.
- Click Categories at the top to display a list of all your
categories.

From this list, you can do the following
- View each category’s type. Categories that use autoscoring are indicated by a hologram icon
(
 ):
):-
System: Predefined autoscoring
categories (). System categories can’t be
edited. However, admins and account managers can customize the Spelling and
grammar, Greeting, and Closing system categories to identify or ignore specific
keywords or phrases in conversations. See Customizing AutoQA system categories.
-
Exact text-match: User-defined
autoscoring categories () that are assessed based on
exact text matches.
- Manual: User-defined and scored categories.
-
Prompt-based: User-defined
autoscoring categories () that use the latest AI models
and human-language prompts to provide AI-powered quality scoring and risk
detection.
-
System: Predefined autoscoring
categories (
- See how many scorecards use each category.
- See whether each category is active or inactive.Note: If a prompt-based category produces over 95% N/A (Not applicable) results for 7 consecutive days, it’s automatically marked as inactive and displays an attention icon (
 ). You must update your prompt to gather
relevant insights before marking it
as active again.
). You must update your prompt to gather
relevant insights before marking it
as active again. - See when each category was last updated.
- Search for categories by name.
- Filter the list by categories assigned to a specific scorecard, category type (system, exact text-match, manual, or prompt-based), status (active or inactive), and applicability (call, text, or both).
- View each category’s type. Categories that use autoscoring are indicated by a hologram icon
(
Editing manual and exact text-match rating categories
Admins and account managers can edit manual and exact text-match categories.
Changes made to the name and description of a category do not affect its reporting.
To edit a manual or exact text-match category
- Access your account's rating categories.
- Under Type, select Manual or Exact text-match.
- Click the name of the category you want to change.
- (Optional) Change the Name and Description of your category.
- (Optional) Adjust the filter settings and scores for your exact text-match category.

- Click Save changes.
Editing prompt-based AI insight categories
Once you have created prompt-based AI insight categories, you can edit, modify, or validate them as needed.
Admins and account managers can edit prompt-based categories.
To edit a prompt-based AI insight category
- Access your account's rating categories.
- Under Type, select Prompt-based.
- Click the name of the category you want to change.
- Edit your prompt as needed.
- (Optional) If the AI suggestions toggle is turned off in your Account settings, click Validate to receive feedback and tips on how to improve your prompt without changing it.
- (Optional) If the AI suggestions toggle is turned on in your Account settings, click Enhance to refine the core intent of your prompt.
- Test your prompt.
- Click Save changes.
Activating a category
Inactive categories aren’t visible in scorecards. To allow it to be used by reviewers for evaluations in selected scorecards and workspaces, it must be marked as active.
To mark a category as active
- Access your account's rating categories.
- Click the options menu (
 ) next to the category you want to activate and
select Mark as active.
) next to the category you want to activate and
select Mark as active.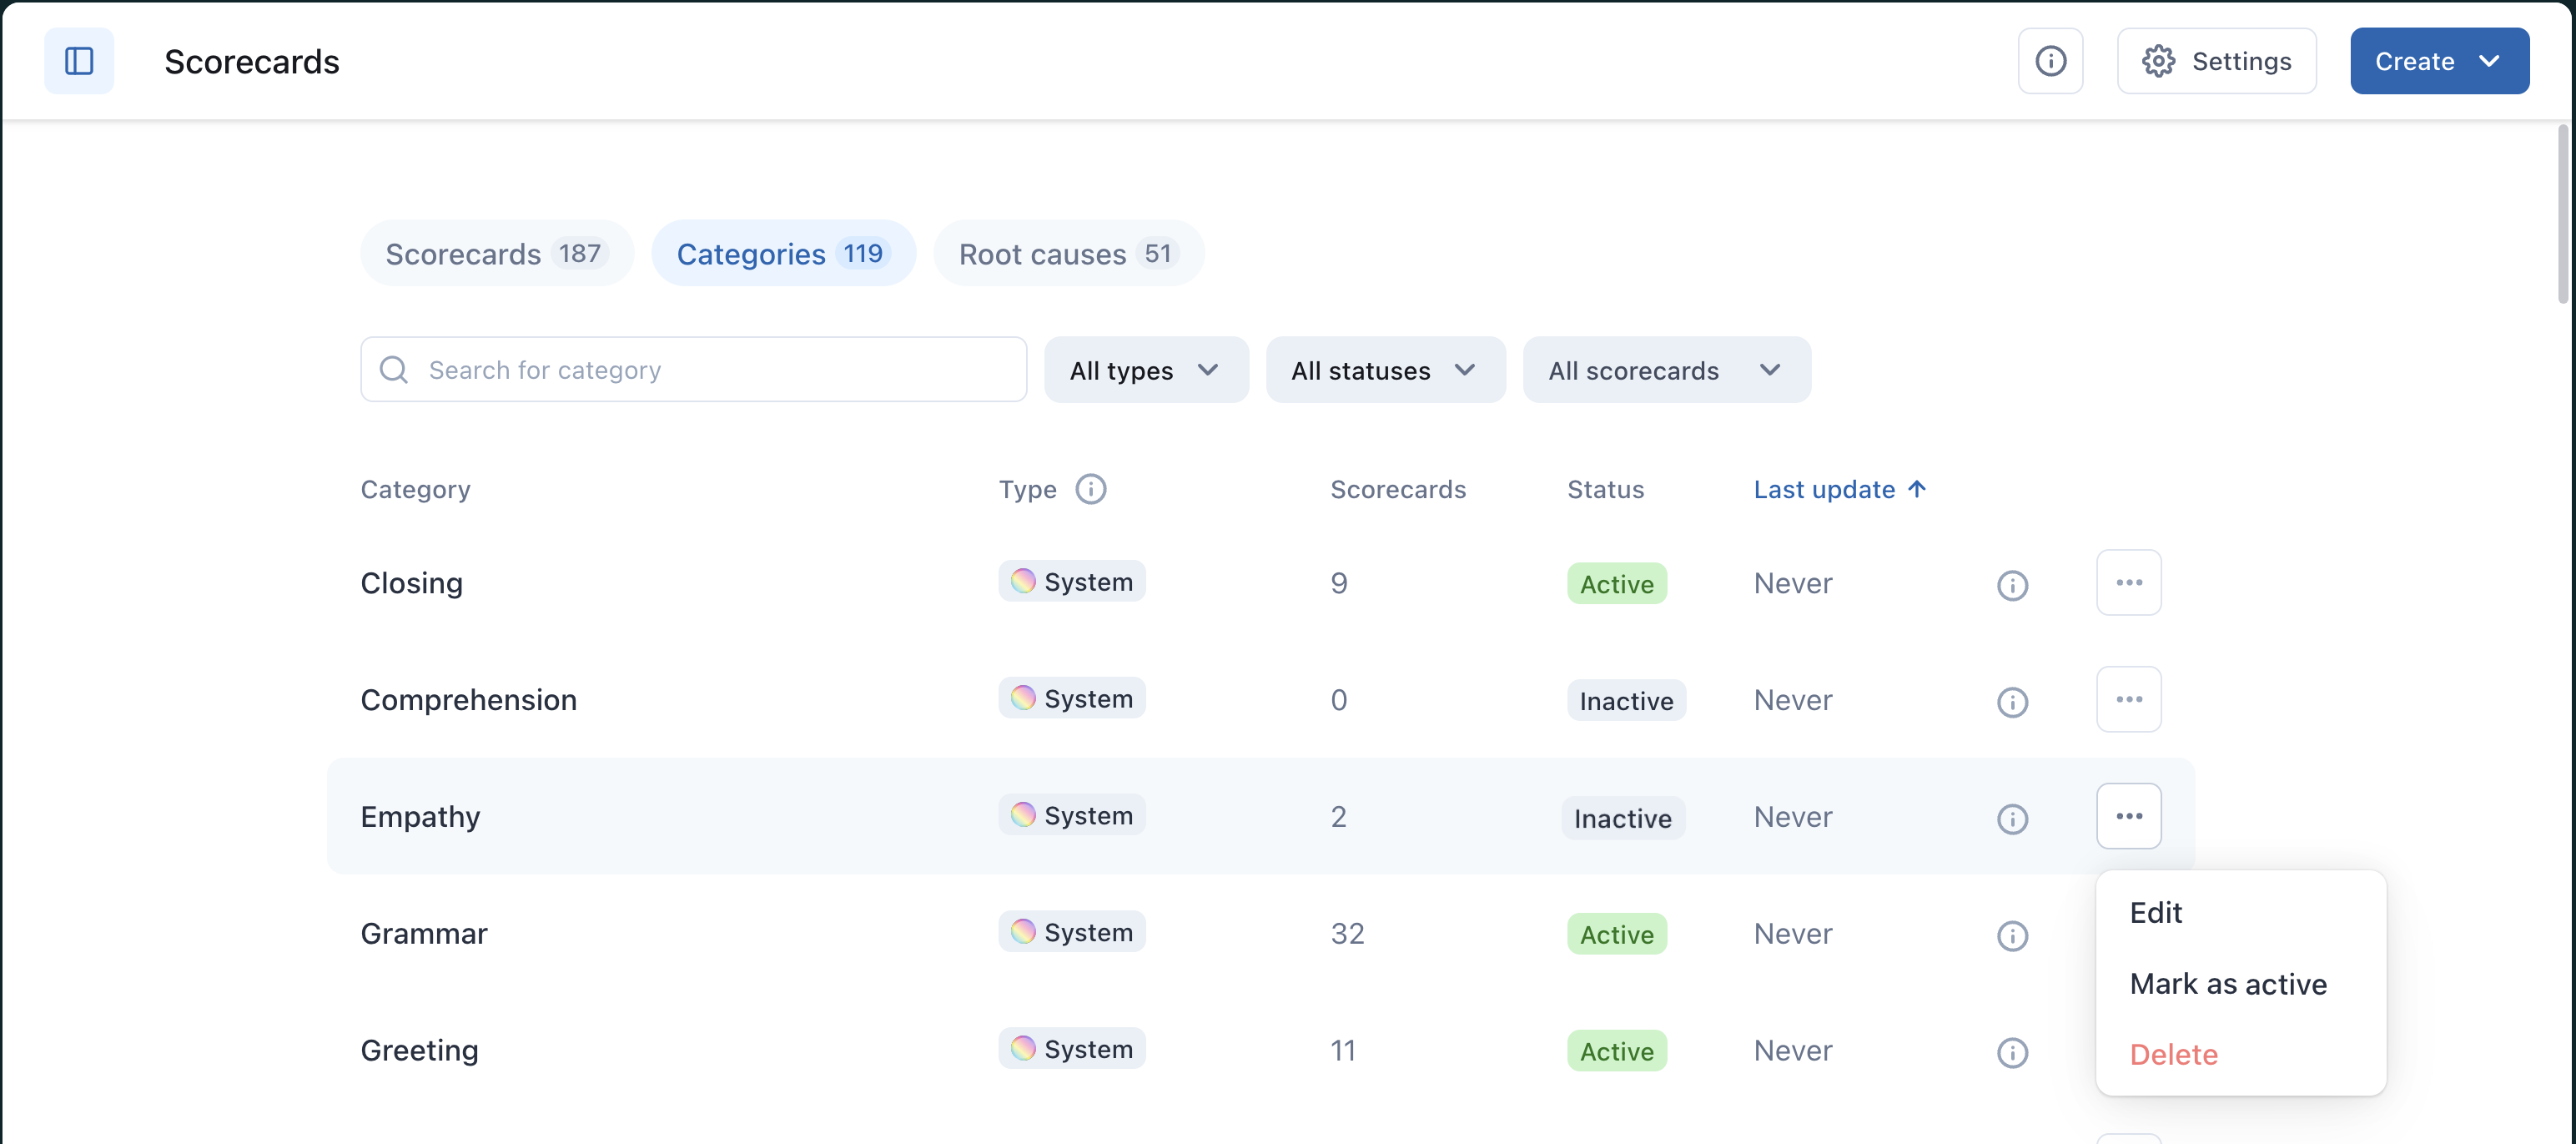
Deactivating a category
A category marked as active is ready to be used for evaluations on scorecards. Marking a category as inactive means it can't be used for evaluations in scorecards and workspaces. Past reviews will not display the removed category. However, removing a category does not affect historical dashboard metrics or overall scores. Deactivated categories remain available in reporting and filtering. Your dashboards continue to reflect accurate historical data, including scores and trends, even after categories are removed.
To mark a category as inactive
- Access your account's rating categories.
- Next to the category you want to deactivate, click the options menu () and select Mark as inactive.

Deleting a category
Deleting categories is permanent. The category is removed from all scorecards. If it's the only category in a scorecard, the scorecard is automatically deactivated.
To delete a category
- Access your account's rating categories.
- Next to the category you want to delete from Zendesk QA, click the options
menu () and select Delete.