You can provide messaging functionality on your mobile app through Android, iOS, and Unity SDKs. You can customize and configure an SDK's appearance and other settings in the Admin Center, then provide your developer with the Channel ID they will need to complete the integration following the official developer documentation.
This article includes the following topics:
Creating a new mobile channel for messaging
Before configuring the Android, iOS, or Unity SDK, you'll need to create your mobile channel in the Zendesk Admin Center and then assign it to a brand before you can customize and configure it, as described below.
To create a new Android/iOS channel
- In Admin Center, click
 Channels in the sidebar, then select Messaging and social >
Messaging.
Channels in the sidebar, then select Messaging and social >
Messaging. - Click the Add Channel button, then select your channel: Android, iOS, or Unity.
- On the Add Android/iOS/Unity SDK page, configure each of the sections:
- Start with the basics: Enter a channel name. If your account has multiple brands, use the drop-down menu to select a brand. Click Next.
- Install in your app: Copy the Channel ID that your development team can use to install the mobile SDK into your app. Use the provided link to view detailed instructions for installing your selected SDK. Click Next.
-
Make it your own: Select a Primary color using the
picker or by entering a hexadecimal number. Enter a channel title to
display in the messaging header. You can refine these selections later
in the configuration sections. Click
Next.
The channel's edit page opens, where you can continue configuring your mobile SDK's appearance and messaging behavior.
Customizing and configuring the Zendesk mobile SDKs
To configure messaging for your mobile channel
- In Admin Center, click
Channels in the sidebar, then select Messaging and social >
Messaging.
- Click the mobile channel you want to update.
- Click the tab with the components you want to customize. Use the links below
to view more detailed information on the options available on each tab:
- Basics (channel name)
- Style (SDK appearance)
- Responses(Business hours, first message, and AI agent activation)
- Notifications (Push notification settings – Android and iOS only)
- Authentication (Security settings)
- Installation (Channel ID and help center embed)
The Basics tab
The Basics tab includes an editable Channel name field.
The Channel name field is populated with the name used in the initial channel setup. Update this name if needed to make it easy to identify in your channels list.

Click Save after making any updates.
The Style tab
The Style tab includes the appearance-related components of the SDK.

You can update the following:
- Primary color, the main color of the launcher button and SDK header. Enter a hexadecimal number, or click the color swatch to open a color picker.
- Message color, the color of the bubble around customer messages. Enter a hexadecimal number, or click the color swatch to open a color picker.
- Action color, the color of any buttons or tappable elements in the conversation, such as Quick Reply messages. Enter a hexadecimal number, or click the color swatch to open a color picker.
- Title, text which appears at the top of the SDK's conversation screen – usually your business or brand name.
- Description (optional) a short piece of text under the title. This can be information you want to share or a tagline, for example. Enter the description in the text box.
Click Save after making any updates.
The Responses tab
The Responses tab allows you to customize the first message, which greets your customers when they initiate a messaging conversation in your mobile app. You can apply a support schedule to create separate default responses for your working hours and add an AI agent.
Applying Support schedules to the channel
When you apply an established Support schedule to your mobile channel, you can create different responses for customers based on whether they contact you during or outside of your set office hours. You can apply any of your Support schedules to the responses.
To apply a business hours schedule to your mobile channel
- In Admin Center, click
Channels in the sidebar, then select Messaging and social >
Messaging.
- Click the name of the channel you want to edit. The Edit channel page opens.
- Click the Responses tab.
- Expand the Business hours section, and use the drop-down to select a saved Support schedule. If you have not created a Support schedule, you can skip this step.
- Expand the Response during business hours section and update as described in Customizing the default messaging response. Repeat for the Response outside of business hours section, if applicable.
- Click Save.
If you remove the business hours schedule, the Response during business hours settings are applied.
Customizing the default messaging response
Whether you are using the business hours option or not, you can customize the response your customers receive when they launch a conversation.
To customize your automated response
- In Admin Center, click
Channels in the sidebar, then select Messaging and social >
Messaging.
- Click the name of the channel you want to edit. The Edit channel page opens.
- Click the Responses tab.
- Expand the Response during business hours section. The default messaging response information is displayed in the text boxes.
- Update the following:
- First message: Use the default message ("We're offline right now. Leave your details so we can get back to you later.”), or enter custom text that appears when a customer initiates a messaging conversation in your mobile app.
-
Customer details: Use the drop-down to select the
information (Name and/or Email) you want to request from
the customer before transferring them to an agent.
Customers must enter information into these fields
before being handed off to an agent.
Note: These settings may be impacted by your end-user authentication configuration.
- Follow-up message: Enter the text that appears after the customer submits the requested details.
- If you're using business hours, expand the Response outside of business hours section and update the information as described in the previous step.
- Click Save.
Adding an AI agent
At the bottom of the section, you have the option to add an AI agent to your messaging configuration, which allows you to offer highly customized and automated support to your customers.

See Creating an AI agent for your web and mobile channels.
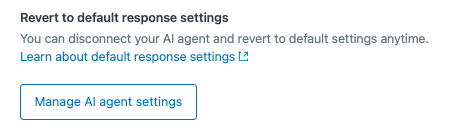
If you have already created an AI agent, you have the option of deactivating it and returning to the default messaging response.
The Notifications tab (Android and iOS only)
The Notifications tab is where you can set up push notifications for the Zendesk Android or iOS SDK.
The required steps for configuring Android and iOS notifications differ. Choose the procedure below that matches your setup.
To configure push notifications for your Android channel
First, create your service account key JSON file which contains your credentials needed for the next steps.
- In the Firebase console, create a new project if you do not already have one.
- Click Settings > Service Accounts.
- Click Generate New Private Key, then confirm by clicking Generate Key.
- Save the JSON file to a secure location.
In most migration scenarios, the Firebase Cloud Messaging (FCM) v1 API is enabled by default. If you encounter errors when trying to contact the endpoint, ensure that Firebase Cloud Messaging API is enabled in the list of APIs and services within the Google Cloud console.
Now configure the notifications in Admin Center.
- In Admin Center, click
Channels in the sidebar, then select Messaging and social >
Messaging.
- Click the name of the channel you want to edit. The Edit channel page opens.
- Click the Notifications tab.
- Enter the following information using the contents of the
service account key JSON file you downloaded above:
- project ID: A unique identifier for your Firebase project.
- Private key: A key that Firebase uses for server-to-server communication.
- client email: The client email address (also called a service account email) associated with the Firebase project.
- Click Save.
- Complete the steps described in the Zendesk Developers guide for setting up push notifications for Android.
To configure push notifications for your iOS channel, you'll need an Apple developer account and a .p12 file from APNs. If you already have these, you can skip to configuring push notifications for your iOS channel.
To create an Apple developer account, enroll here.
After you're enrolled, you can generate the .p12 file using these instructions from the Apple developer website.
To generate a .p12 file
- Log in to the Apple Developer Member Center and navigate to the certificates list.
- Click the + button at the top of the page to create a new certificate, and select Apple Push Notification service SSL (Sandbox & Production).
- Select your app ID from the drop-down and click continue.
- Follow the instructions to generate a Certificate Signing Request (CSR) using Keychain Access, and upload it to generate your certificate.
- Once the certificate is ready, download it to your computer and double-click it to open it in Keychain Access.
- Right-click the certificate you created, and select Export "Apple Push Services: {your-app-id}."
- Choose a password and save the .p12 file to your computer.
Now, you're ready to configure your push notifications.
To configure push notifications for your iOS channel
- In Admin Center, click
Channels in the sidebar, then select Messaging and social >
Messaging.
- Click the name of the channel you want to edit. The Edit channel page opens.
- Click the Notifications tab.
- Upload the .p12 file from APNs and enter the certificate password.

- Click Save.
- Complete the steps described in the Zendesk Developers guide for setting up push notifications for iOS.
The Authentication section
Installing messaging on your mobile app
To install messaging on your mobile app, your you'll need to give your developers a Channel key. You can find the Channel key, along with a link to the Zendesk developer documentation, in the Installation section.
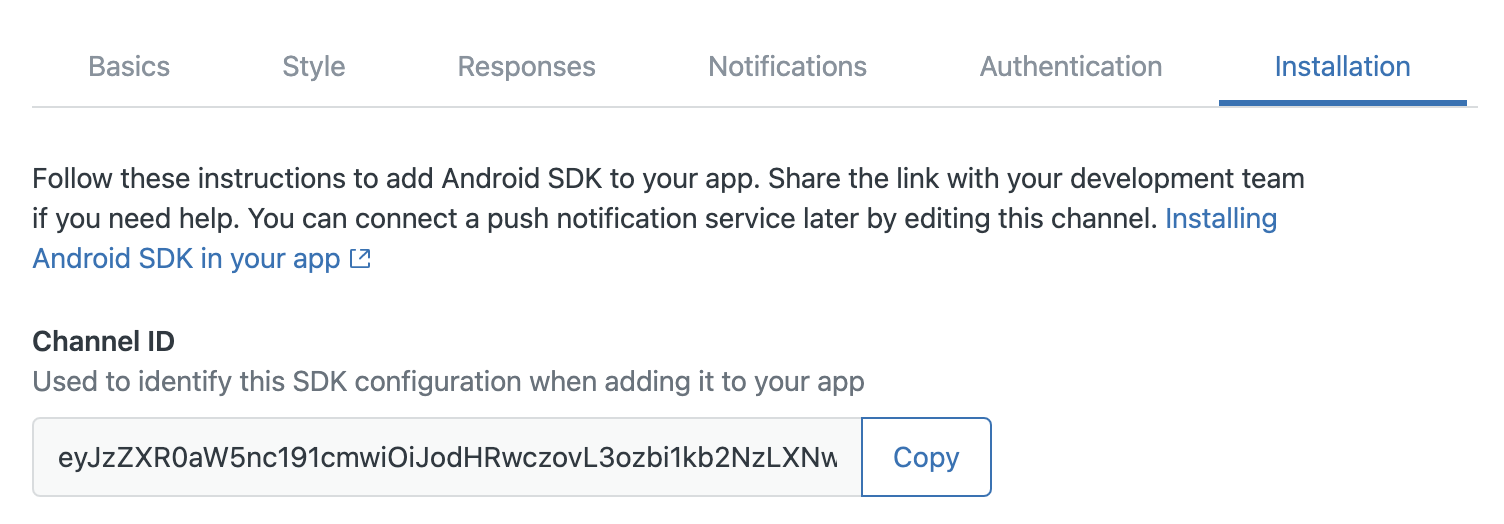
To obtain the Channel ID
- In Admin Center, click
Channels in the sidebar, then select Messaging and social >
Messaging.
- Hover your cursor over the brand you want to update, click the options icon
(
 ), then click
Edit.
), then click
Edit. - Click the Installation section.
- Under Channel ID, click the Copy button to save the key to your clipboard.
- Send this information to your developers.