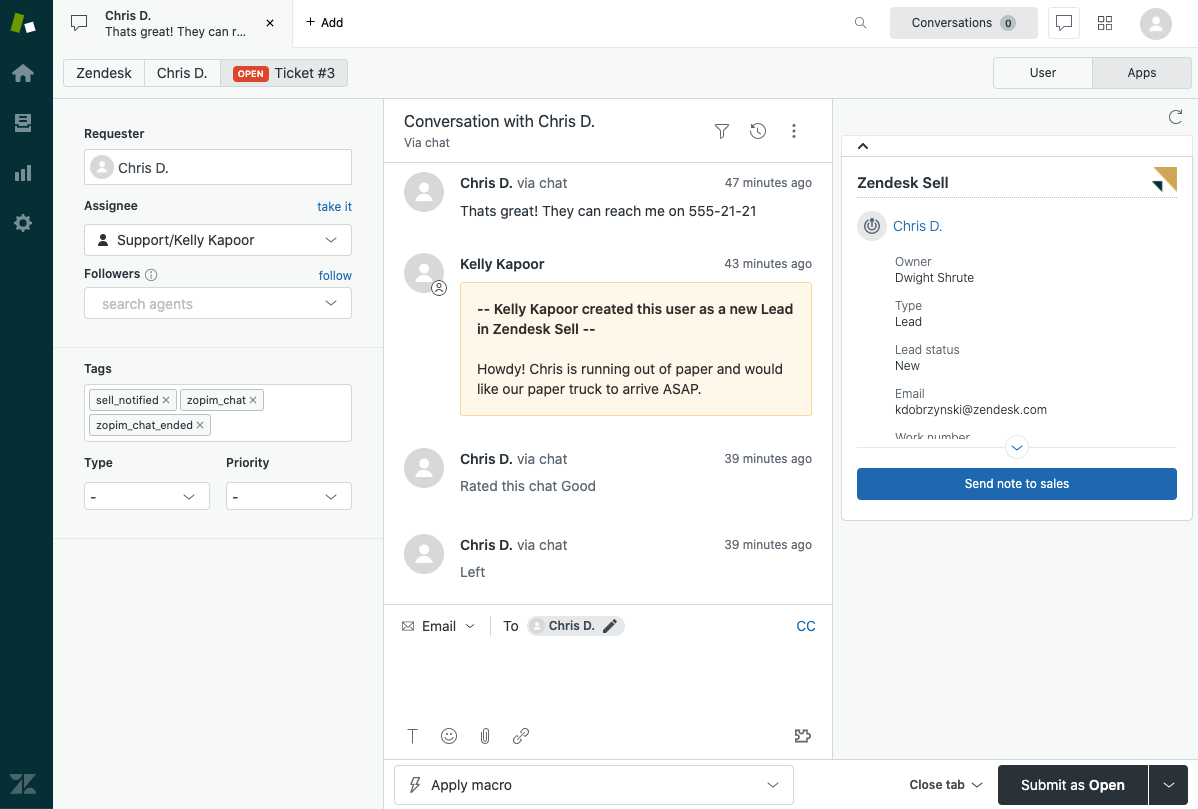
If you have installed the Zendesk Sell app in Support, you can view the contact information for Zendesk Sell leads and contacts on tickets and end-user pages in Support (see About integrating Sell and Support for an overview of customer communication in your company).
The Sell app in Zendesk Support provides greater visibility between the two systems and helps support agents understand more about the requester.
This article covers the following topics:
- Viewing customer information
- Notifying Sales about current Sell leads and contacts
- Creating a lead in Sell from Zendesk Support
- Resolving common issues that occur when setting up the Sell app in Support
Related articles:
Viewing customer information
The Sell app in Zendesk Support allows your support agents to see specific Sell information related to a Support ticket requester. This gives your support agents useful context before they reach out to provide service for the customer. The app uses the requester's email address or phone number to pull in relevant information from Sell including:
- Information about the last point of contact
- Links to their website or X (formerly Twitter), Facebook, or LinkedIn pages
- Sell owner
- Type of record in Sell (e.g. Lead or Contact - for both the person and the company)
- Status of the record (if applicable)
- Related deals (if applicable)
- Phone numbers (work and mobile)
- Address
- Description of the Sell lead or contact
- Custom fields values
Notifying Sales about current Sell leads and contacts
Click Send note to sales in the Zendesk Sell app for Support to notify the sales team about existing leads or contacts that have been contacting Support. This will add a note to the lead or contact in Sell. The note is then sent to Sell and the lead or contact owner will receive a notification.

Creating a lead in Sell from Zendesk Support
If want to connect a requester from an incoming ticket with someone from your sales team, you can create a lead in Sell.
- In the Zendesk Sell app in Zendesk Support, click Create lead.
This option only becomes available if no lead or contact is found in Sell.

- (Optional) Add a note and click Create.
The lead with the requester name is created in Sell. The requester's email address, phone number, X (formerly Twitter), Facebook and organization name are added to the lead's contact information in Sell.
The lead status, owner, and source are set according to how it is set up in the Zendesk Sell-Support integration. Depending on your combination of settings, during the lead creation process, an agent may be asked to choose a distribution or specify a sales rep that the lead will be assigned to.

The note is supplemented with the name of the agent who created the lead, and a link to the ticket that will appear in the new lead's Activity Feed in Sell. The Support ticket is also updated with a comment that the lead was passed on to Sell.

Resolving common issues that occur when setting up the Sell app in Support
If an agent cannot see the lead or contact data in the Sell app, or they cannot create leads, then it means the Sell administrator has not configured the app to allow these actions. To allow agents to see the information in the Sell app, a Zendesk Sell administrator must grant them access (see Setting up your Zendesk Sell-Support integration).
