Ticket trigger categories allow you to visually group ticket triggers for easier organization and management. This article describes how admins and agents in custom roles with business rules permissions can create ticket trigger categories.
This article includes the following sections:
- About ticket trigger categories
- Creating categories for ticket triggers
- Organizing ticket triggers within categories
- Using the Zendesk API for ticket trigger categories
Related articles:
About ticket trigger categories
To help you manage ticket triggers in your account, you can add additional ticket trigger categories. Ticket trigger categories enable you to arrange ticket triggers into groups or collections based on trigger functions or other criteria. This feature is particularly useful for accounts that have a large number of ticket triggers. You can expand or collapse the categories to show or hide triggers in each collection.
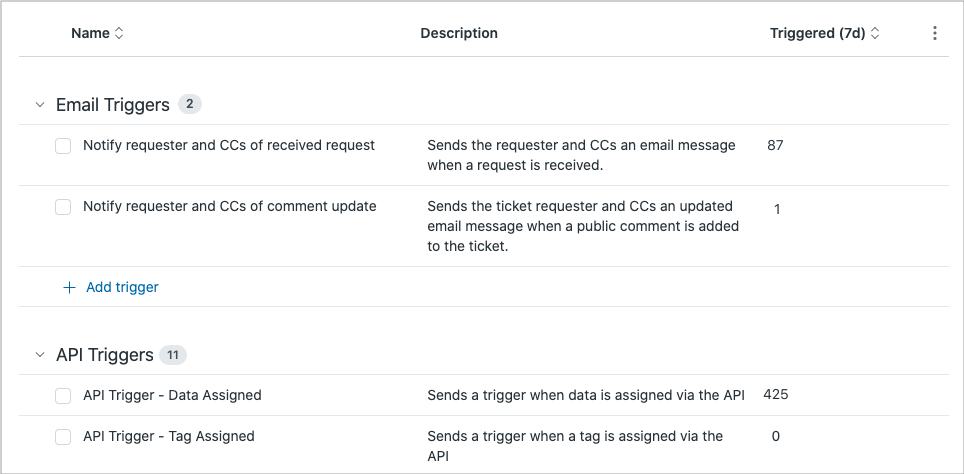
When you decide how to group your ticket triggers into categories, keep in mind that the order you set for ticket trigger categories must match the order in which you want triggers to run. Run order will have a big impact on how you decide to create and organize triggers within categories. For example, in the illustration above, all triggers in the Email Triggers category run before any triggers in the API Triggers category. For more information, see Understanding when ticket triggers run and fire and the best practices for ordering your ticket triggers.
Creating categories for ticket triggers
You can create new trigger categories and add ticket triggers to them.
To create a trigger category for ticket triggers
- In Admin Center, click
 Objects and rules in the sidebar, then select Business rules >
Triggers.
Objects and rules in the sidebar, then select Business rules >
Triggers. - Select the Tickets tab.
- Open the Add trigger drop-down menu at the top of the tab and select Add
category.

- Enter a name for the category and click Add.
A new category appears at the bottom of the ticket triggers list. You can create new ticket triggers and add them to the category, or move existing ticket triggers to the category.
- To create a new ticket trigger and add it to the category, click +Add trigger in
the category.

For details on adding triggers, see Creating ticket triggers for automatic ticket updates and notifications.
- To move an existing ticket trigger to the category, you can drag-and-drop it into the category or edit the trigger and select the
Category.

You can also reorder triggers using drag-and-drop to move ticket triggers between categories.
Organizing ticket triggers within categories
Once you've added trigger categories, you can do the following to organize ticket triggers within categories:
- To set the order of ticket triggers within a category, see reordering ticket triggers.
- To move ticket triggers from one category to another, you can:
- Drag-and-drop one or more ticket triggers between categories. For more information on how to drag-and-drop triggers, see Reordering triggers.
- Select the checkbox next to one or more ticket triggers, click Move to category, select the category, and click Move. When using this method to move ticket triggers into a category, their order will be the same as they were in the original category.
- Edit the ticket trigger and select a new Category.
- To add a new ticket trigger to a specific location in the triggers list, click the
options menu icon (
 ) next to a ticket trigger, then choose Add trigger below
from the menu.
) next to a ticket trigger, then choose Add trigger below
from the menu. 
- To delete a ticket trigger from a category, see Deleting ticket triggers.
Using the Zendesk API for ticket trigger categories
Once you are using trigger categories, you can designate a category when creating a new ticket trigger via the Zendesk API. If you don’t specify a category when creating a new ticket trigger, Zendesk will select a category for you. You’ll also be able to make changes to trigger categories themselves through the API. See our API documentation.