Verified AI summary ◀▼
Proactive messages let you start conversations with customers through the Web Widget based on set conditions. You can create messages, choose between human or AI agent responses, and format them with rich text, emojis, and links. Set rules for when messages are sent, pause or resume them as needed, and troubleshoot issues by adjusting conversation control settings.
Proactive messages allow you to initiate conversations through the Web Widget with customers based on specified conditions you define.
In this article, we’ll take you through the following tasks:
For an overview of proactive messages and how they work, see About proactive messages.
Creating the proactive message
Proactive messages are created on the Proactive messages page in Admin Center.

You can create up to 140 proactive messages.
To create a proactive message
-
In Admin Center, click
 Channels in the sidebar, then select Messaging and social > Proactive
messages.
- On the Proactive messages page, click the Create proactive message button.
-
Under
Compose messages, specify the following
information for
the new message:
- Name: Enter a brief but descriptive name for the proactive message.
- Brand: If you have multiple brands, use the dropdown to select a brand for the message. Brands can run multiple proactive messages simultaneously.
- Channel: Use the dropdown to select a Web Widget for the message. Only channels connected to the brand selected above appear in the menu. Each proactive message can only be published on one channel.
- Click Next to open the new message configuration page.
Composing the message
After you’ve added the proactive message to your account, you can compose the message text. Composing the message requires adding and formatting the text that will greet your customers, then selecting and configuring the response type.
There are two response types you can choose from:
- Human agent: Lets you create a simple follow-up to the initial message before handing the customer over to a human agent.
- AI agent: Lets you use an answer as a follow-up message.
Composing a message for each response type has slightly different steps. The sections below describe these in more detail.
Composing a proactive message with a human agent response
The basic customer experience for a proactive message with an agent response is:
- An initial greeting, or message, to the customer
- A follow-up message to transition the customer to a conversation with a human agent
- A request for the customer’s name and/or email address (optional)
For a more detailed example from the customer’s perspective, see Customer experience: Agent response.

To compose the message with a human agent response
- In the Compose messages section of the configuration page, use the required Proactive message box to enter the text for your initial message.
- Under Choose how to respond, click Human agent.
- Enter the follow-up message. This can let the customer know they’re being transferred to a live agent, and introduce the request for additional information (if used).
- In the optional Customer details section, a request for both the customer’s name and email address are included by default. Click the X to delete either detail (or both). Click the down arrow to add back the deleted field(s). Deleting both fields removes the data collection request from the proactive message.
- Click Next to expand the Set the rules section.
Composing a proactive message with an AI agent response
The basic customer experience for a proactive message with an AI agent response is:
- An initial greeting, or message, to the customer.
- An answer, which transitions the customer to the AI agent.
For a more detailed example from the customer’s perspective, see Customer experience: AI agent response.

To compose the message with an AI agent response
- In the Compose messages section of the proactive message’s configuration page, use the Proactive message box to enter the text for your message.
- Under Choose how to respond, click AI agent.
-
Note the AI agent being referenced. If it is incorrect,
click Edit AI agent
and choose
the AI agent you want to use.
Only AI agents connected to the channel you selected in the Compose messages section can be used. If necessary, create a new AI agent with the messaging you need, or publish an existing AI agent to the channel.
- Use the Response drop-down to choose the answer you want to use as your customer follow-up message. If needed, click Edit answer to make changes to the selected answer.
- Click Next to expand the Set the rules section.
Formatting the proactive message
You can format the proactive message with rich text, emojis, external links, name personalization, and dynamic content.
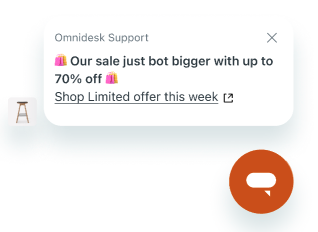
Rich text
You can apply the following rich text formatting to the proactive message:
- Bold
- Italics
- Underline
- heading styles
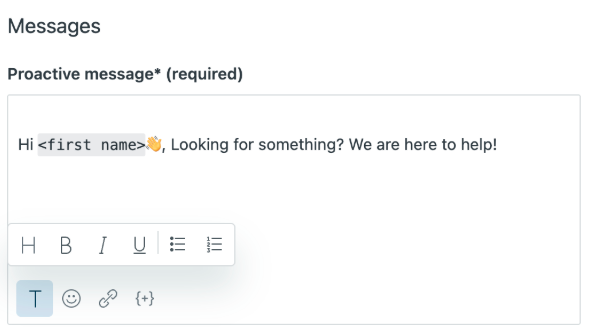
To apply rich text to the proactive message
- Select the text you want to format.
-
Click the Format text
icon (
 ),
and select the
rich text formatting
you want to apply.
Emojis
You can choose from a standard set of emojis to add personality to your message.
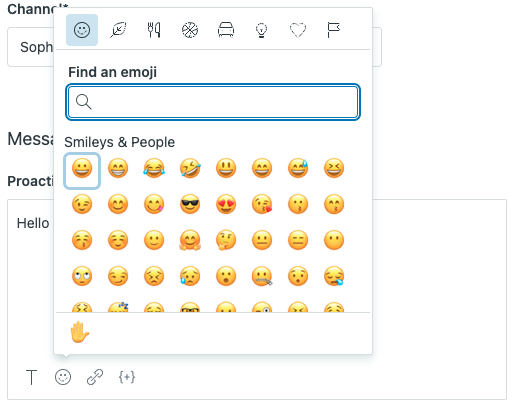
To use emojis in the proactive message
- Place the cursor where you want to insert the emoji.
-
Click the Emoji
icon (
 )
to select from
available emojis.
External links
You can include external links in your proactive messages.

To add a link to the proactive message
- Place the cursor where you want to insert the link, or select the text you want to add the link to.
-
Click the Link
icon (
 ).
).
- In the Add link window, enter the URL and the text you want to display.
- Click Add link.
Name personalization
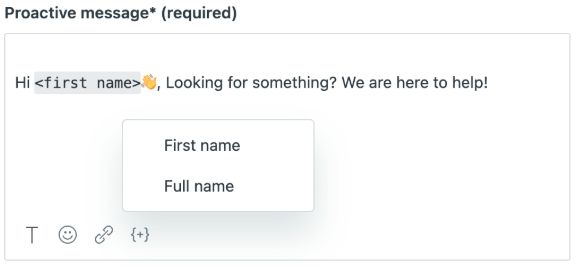
To use name personalization in the proactive message
- Place the cursor where you want to insert the name placeholder.
-
Click the Add a variable
icon (
 ).
).
- Select First name or Full name.
Dynamic content
If your account allows you to use dynamic content, you can manually add it to your proactive message.
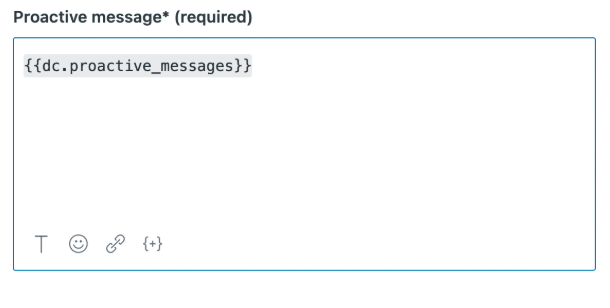
To use dynamic content in the proactive message
- Place the cursor where you want to insert the dynamic content.
- Enter the placeholder for the dynamic content you want to use.
Setting the rules
Next, you’ll need to set the rules, which includes:
- Adding conditions. A condition includes an object (visitor or device), an operator, and a value. You can also nest conditions to create more complex conditional logic. You can expand the Condition key to use as a reference.
- Configuring the timing for checking conditions. Here, you’ll determine what event can trigger the condition check – usually when the customer visits a specified web or help center page, often for a specified amount of time.
For more information on the options for building conditions, see Proactive messaging conditions and events reference.
To set the condition rules
- In the Set the rules section, configure the conditions that must be met to send a proactive message.
- Click Add condition.
- Use the drop-down field to select an Object as the subject of the condition.
-
If you’re using the
customer’s visit information
as a
condition for sending the message, select
Visitor
in the Object
drop-down, then:
- Use the Field drop-down to choose what information to consider: The Page URL of the customer’s current page, the Page title of the customer’s current page, or the Visit history of the customer.
- Use the Operator drop-down to choose an operator. Depending on your Field selection, this can be Is, Is not, Contains at least one of, or Doesn’t contain.
-
Use the
Value
field to enter the page URL or title to
check. If you selected Visit history in the
Field drop-down,
choose
New user
or
Returning user.
Note: Page URL and Page Title values are case-insensitive.
-
If you’re using
information from the device the customer is on,
select
Device
in the Object drop-down, then:
- Use the Field drop-down to select the Language option.
- Use the Operator drop-down to choose an operator, Is or Is not.
- Use the Value drop-down to select the language you want to check for. This value is checked against the language set on the customer’s device.
- Click Add to save the condition.
- To add another condition to the rule, click the + and select Add condition. Repeat steps 4 and 5 as needed.
- To create a nested condition, click the + and select Add nested condition. A nested condition is a condition that contains two or more conditions inside it. You can use nested conditions to build complex logic that relies on multiple conditions. They are especially useful when combining conditions using both AND and OR.
- Under When to check the conditions, use the Event drop-down to define what customer event causes a condition check, then use Minutes and Seconds to define how long the event must last before the check is triggered.
- Optionally, add tags to the tickets created from the proactive message interaction.
- Click Next to expand the Schedule section.
Choosing when to send the message
Finally, you’ll choose when, and how often, to send the message to the customer, and publish your message.
To choose when to send the message
-
In the
Choose when to send
section, select the Time of day for
sending the proactive message:
- Any time conditions are met. This sends the message whenever the customer meets the conditions defined in the previous section, regardless of any set business hours.
- Only during business hours. This lets you select one of your previously-defined schedules to restrict when proactive messages are sent. This option is only available if you have setbusiness hoursfor the channel.
- Only outside of business hours. This sends the message only when the customer meets the conditions outside of any previously-defined schedules. This option is only available if you have setbusiness hoursfor the channel.
-
Under
Frequency,
choose how often a customer will receive a proactive message:
- Once per customer. Message will only show the first time the customer meets the conditions. After clearing the browser’s cache, the customer will be treated as a new user at their next visit and will see the message again.
- Once per visit. After the message is opened or dismissed, it won't show again until the customer’s next visit.
- Every time the conditions are met. Recommended only for critical or time-sensitive messages.
- Click Publish.
Pausing and resuming proactive messages
All published proactive messages can be paused manually by admins at any time. Paused proactive messages are indicated by a Paused label in the Proactive messages list:

Proactive messages that use AI agent capabilities, such as generated replies, are automatically paused when your account is configured to pause AI agent functionality when it reaches its automated resolution limit. These proactive messages will automatically resume when automated resolutions are again available on your account. Proactive messages paused for this reason are indicated by a warning icon next to the Paused label in the Proactive messages list:

To manually pause a proactive message
-
In Admin Center, click
 Channels in the sidebar, then select Messaging and social > Proactive
messages.
-
In the Proactive messages list, hover over the message you
want to pause and
click the options menu icon (
 ).
).
- Select Pause.
To manually resume a proactive message
-
In Admin Center, click
 Channels in the sidebar, then select Messaging and social > Proactive
messages.
-
In the Proactive messages list, hover over the message you
want to resume
and click the options menu icon (
 ).
).
- Select Resume.
Troubleshooting proactive messages
If your proactive messages are not sending correctly, check that Conversation control is set to Release control.
To configure Conversation control
-
In Admin Center, click
 Channels in the sidebar, then select Messaging and social >
Messaging.
- On the Messaging channels page, click Manage settings.
- Expand the Conversation control section and select Release control.
- Click Save settings.