An interface is provided to configure data flows within your AWS account. AppFlow then establishes the connection, extracting the appropriate data from Zendesk, actioning transformations, and loading the data into your chosen target service.
This article guides you through the process to set up a Zendesk data flow in Amazon AppFlow. To use Amazon AppFlow, you will need:
- Administrator permissions in Zendesk Support
- Access to your AWS account console
- An OAuth client for your Zendesk account
This article contains the following topics:
- Registering your application with Zendesk
- Creating a flow
- Step 1: Specify flow details
- Step 2: Configure flow
- Step 3: Map data fields
- Step 4: Add filters
- Step 5: Review and create
- AppFlow integration limits
Related information:
Registering your application with Zendesk
To use Amazon AppFlow, you need to register the application to generate OAuth credentials that your application can use to authenticate API calls to Zendesk. This is done in Zendesk Support.
- In Admin Center, click
 Apps and integrations in the sidebar, then select APIs > Zendesk API.
 - Click the OAuth Clients tab, and click Add OAuth client on the right side of the client list.
- Complete the following fields to create an OAuth client for AppFlow:
- Client Name - Enter a name for your AppFlow application. This is the name that users will see when asked to grant access to your application, and when they check the list of third-party apps that have access to their Zendesk.
- Description - Optional. This is a short description of your app that users will see when asked to grant access to it.
- Company - Optional. This is the company name that users will see when asked to grant access to your application. The information can help them understand who they're granting access to.
- Logo - Optional. This is the logo that users will see when asked to grant access to your application.
- Unique Identifier - The field is auto-populated with a reformatted version of the name you entered for your app. You can change it if you want.
- Redirect URLs - Enter “ https://{aws_region}.console.aws.amazon.com/appflow/oauth”. Replace {aws_region} with the AWS region where you're creating the flow. Example: "https://ap-southeast-2.console.aws.amazon.com/appflow/oauth".
- Click Save. A new pre-populated Secret field appears on the lower side.
- Copy and save the secret key somewhere safe.
- Click Save.

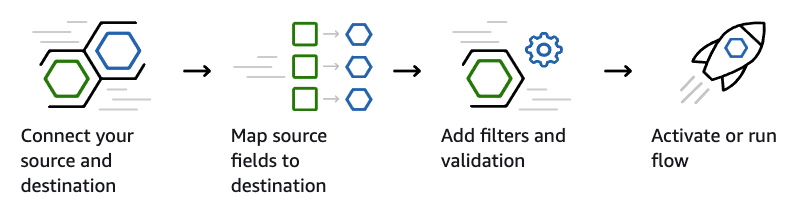
Creating a flow
A flow is created in your AWS account console by completing a series of steps in the setup process.
- Log in to your AWS account console and select AppFlow from the services menu.
- Click Create flow.

Complete setting up a flow as described in the following sections.
Step 1: Specify flow details
In Step 1: Specify flow details, you configure the name and details about the flow.
- In Step 1: Specify flow details, enter the following details for your flow:
- Flow name - Enter a name for your flow.
- Flow Description - A description of your flow.
- Data Encryption - Configure the encryption for your flow. You have the option to use the default key, or customize encryption by creating an AWS KMS key or using an Amazon Resource Name.
-
Tags -Add tags to your flow as key value pairs to your flow.

- Click Next.
Step 2: Configure flow
In Step 2: Configure flow, you nominate your Zendesk source data and where you want the data to go such as S3, Redshift, or selected SaaS apps.
- In Step 2: Configure flow, under Source details, select “Zendesk”in the Source name drop-down selection.
- Click Connect.
- In the modal, enter the client Id and secret of the OAuth client you created earlier in Support, your Zendesk subdomain, and connection name.
Note: If you receive an error message, first check the redirect URL in your AppFlow OAuth client in Support. If you still encounter errors, contact your AWS admin to check your AWS roles or permissions. - In the pop-up window, click Allow to let AppFlow access your Zendesk data. You must be a Zendesk admin to allow access.

- In the Choose Zendesk object drop-down selection, select the type of Zendesk data to sync.
- Under Destination details in the Destination name drop-down selection, select the destination for your Zendesk data.
- If you select S3 as your destination, select the S3 bucket to send data
- If you select another destination, click Connect and follow the prompts in the modal to complete the connection

- In Flow trigger under Choose how to trigger the flow, select either “Run on demand” to activate the flow manually, or “Run on schedule” to activate the flow on a schedule. If you choose “Run on schedule”, set the schedule frequency.

- Select Transfer only new data to only transfer new data that is new when the flow is triggered, or Transfer all data if you want the flow to transfer all data.
- Click Next.
Step 3: Map data fields
In Step 3: Map data fields, you specify how the fields in your Zendesk data map to the fields in the destination.
- Choose the mapping method to map fields.
- Manually map fields - To map all fields, choose Source field name, Bulk actions, and Map all fields directly. Otherwise, select one or more fields from Source field name, Source fields, and then choose Map fields directly.
- Upload csv file with mapped fields - Use a CSV file to define the mapping. The CSV file contains comma-separated values of the source field name and destination field name.
- To concatenate fields together, select the mapped fields and select Add formula.

- To mask fields or truncate field names, select the mapped fields and select Modify values.
- For Validations, click Add validation configure how data fields are handled based on the condition.

- Click Next.
Step 4: Add filters
In Step 4: Add filters, you create rules that determine which data is extracted from your Zendesk account each time the flow is triggered.
- In Filters, click Add filter, then select the field, select a condition, and specify the criteria.

- Click Next.
Step 5: Review and create
In Step 5: Review and create, you can review your flow configuration before creating it.
- Check your configuration is correct. Click Edit in the upper-right if you need to revise the configuration.
- Click Create flow.
Your flow is now created!
AppFlow integration limits
Amazon imposes the following limits on AppFlow:
- One million flows per account
- 10 million flow runs a month
- Each flow can have no more than one source and one destination
- Each flow can include no more than 10 tasks