Summary: ◀▼
You can control how intelligent triage classifications appear to agents by showing topic and sentiment in the ticket header and deciding whether topic, sentiment, and language fields are visible and editable in ticket forms. This helps agents review AI classification at a glance, update fields when needed, and report on manual changes to spot misclassified tickets.
Intelligent triage uses AI to automatically classify new customer support tickets by topic, sentiment, language, and entities, such as product names.
This article describes how to configure which intelligent triage classifications are shown to agents. By configuring how intelligent triage classifications appear in the Agent Workspace—such as displaying topic and sentiment in the ticket header—you can make relevant information available to your agents at a glance. Additionally, you can control agent access to auto-filled fields within ticket forms, allowing for manual updates if needed.
This article contains the following topics:
- Displaying topic and sentiment in the ticket header
- Determining whether agents can see and update intelligent triage fields
Related articles:
Displaying topic and sentiment in the ticket header
For topic and sentiment, you can configure whether the signaled information is displayed in the ticket header of the conversation for agents.
The view how this information appears to agents, see Viewing intelligent triage classifications in tickets.
- In Admin Center, click
 AI in the sidebar, then select Agent copilot > Auto assist.
 - Scroll down to the Ticket context section.
- Click the Show topic in the header checkbox to display the topic that's been signaled in the conversation.
- Click the Show sentiment in the header checkbox to display the
sentiment signaled in the conversation.

- Click Save.
Determining whether agents can see and update intelligent triage fields
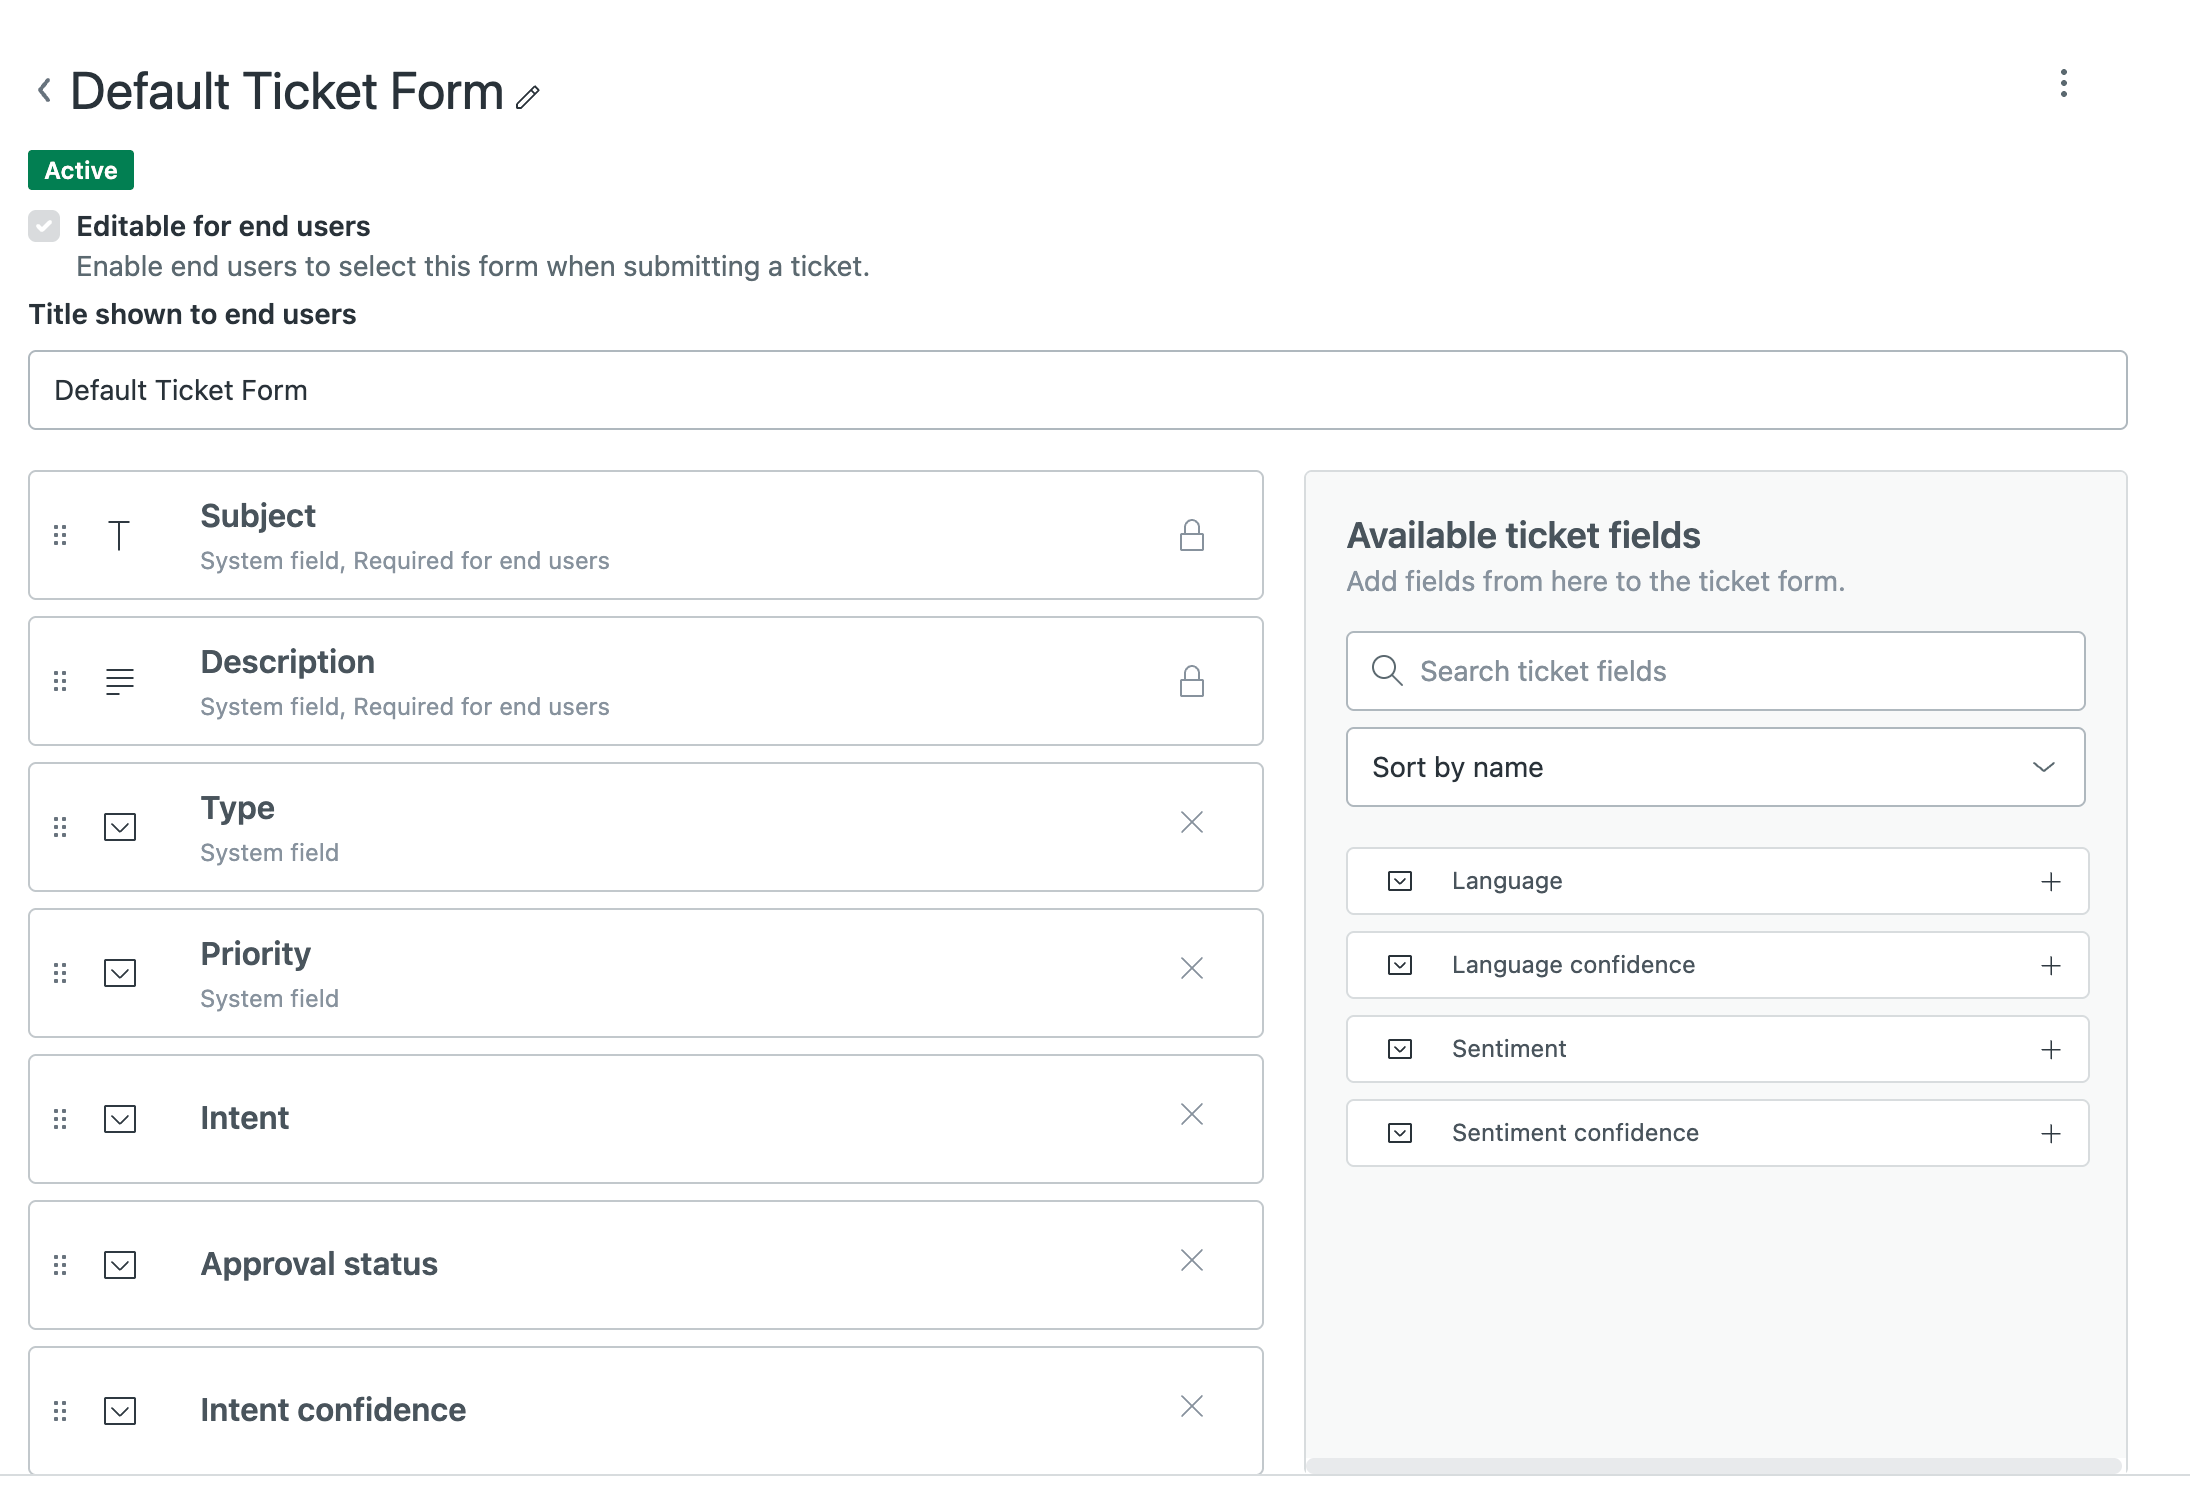
When intelligent triage is turned on, the system automatically fills out the topic, sentiment, and language fields, but admins can control whether the fields are displayed and editable for agents.
Whether the fields appear by default depends on your ticket forms. Specifically:
- If you have a single ticket form, the intelligent triage fields are
automatically visible in tickets.
Edit your ticket form to remove the new fields if you don’t want agents to be able to see and change these fields in tickets.
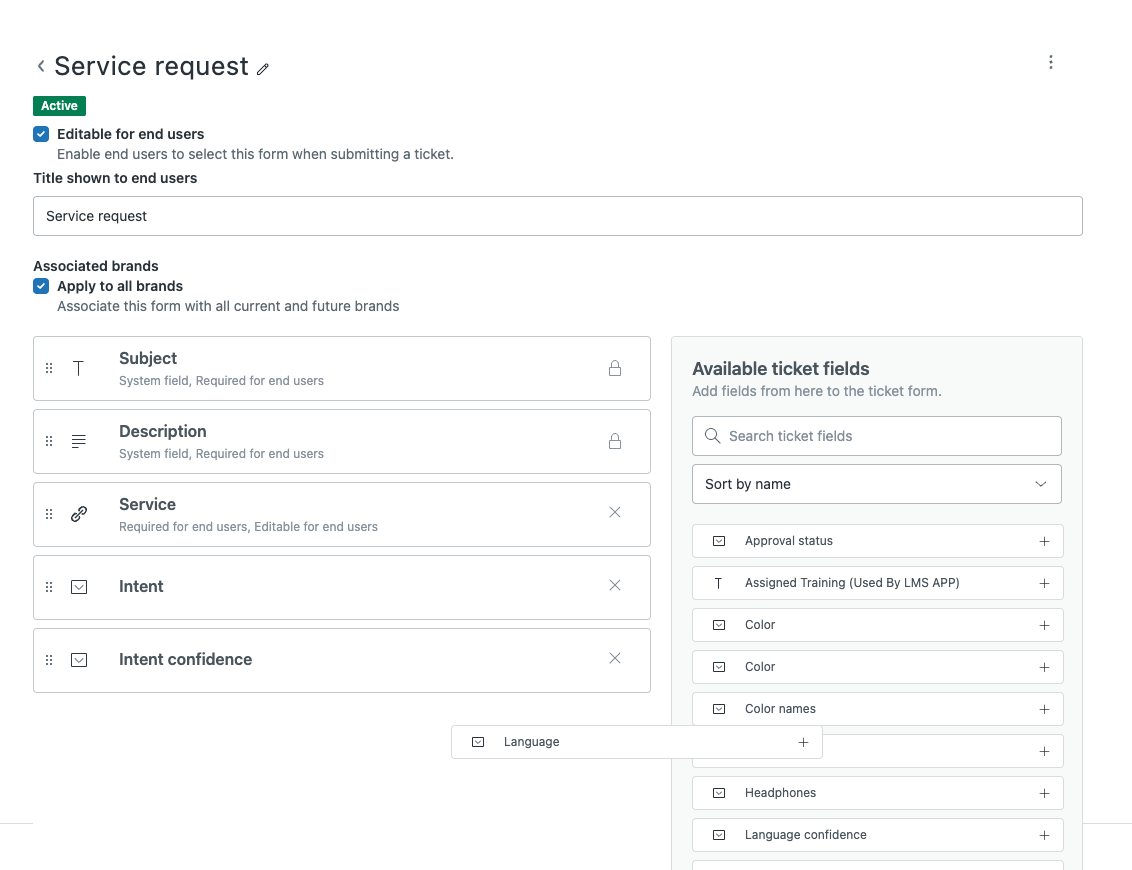
- If you have multiple ticket forms, the intelligent triage fields are not
automatically visible in tickets. You can edit your forms by adding the fields
so that agents can see and update them in tickets.
Any entities you created must also have their custom fields added to your forms.
When the topic, sentiment, and language fields are displayed to agents, they can update the values in the fields if they feel they're not correct.
- In Admin Center, click
 Objects and rules in the sidebar, then select Tickets > Forms.
 - Follow one of the options below:
- For a single ticket form, open the ticket form for
editing, then click the x on the field you want to remove.
You can drag a field onto the ticket form if you want to add it
back.
- For multiple ticket forms, open the ticket form, then
drag the intelligent triage fields you want to add onto your form.
You can click the x on the field if you want to remove it from the
form.
- For a single ticket form, open the ticket form for
editing, then click the x on the field you want to remove.
You can drag a field onto the ticket form if you want to add it
back.
- Click Save.