Verified AI summary ◀▼
Use draft mode to refine your public replies in tickets before sending them. Turn draft mode on or off using the draft icon or a keyboard shortcut. Draft mode prevents accidental sends by requiring confirmation before making replies public. Your draft mode preference is remembered, ensuring consistent use across tickets, unless set otherwise by an admin.
When you’re composing messages in a ticket, it’s important to make sure everything is correct before you send your reply to a customer. In the Zendesk Agent Workspace, you can compose your public replies as drafts first, before you send the update.
This article contains the following topics:
Composing draft messages
Use draft messages to refine your ticket updates before you send them to a customer.
To write a draft
- In a ticket, select a channel from the menu at the top of the composer.
You can select any channel except Internal note in the ticket composer to compose a draft message. This includes email, chat and messaging channels, and other public replies.
- Click the draft icon (
 ) to turn on draft mode.

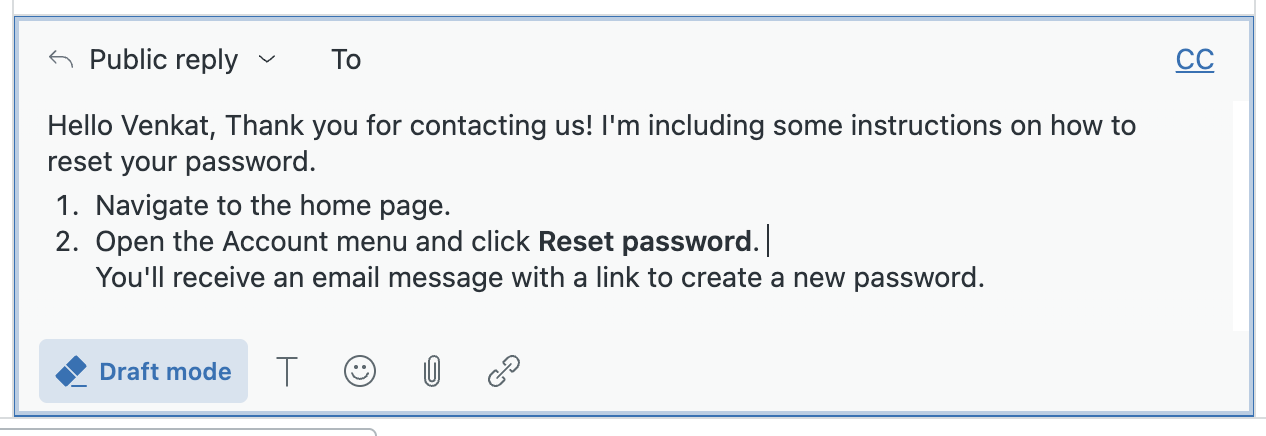
When draft mode is on, you’ll see a Draft mode button in the composer and the composer text appears on a light grey background.

Click this button to turn draft mode on or off. Draft mode remains on until you turn it off.
- When draft mode is on, type your reply in the composer.

- When you're ready to make the reply public, click Submit.
A draft warning message appears asking if you want to send the draft to the public channel.

- Click Go back to return to editing the draft or click Send to make the reply public.
Note: You can also turn off draft mode first, then submit the reply. In that case, the message is no longer a draft and no draft warning message appears.
Zendesk remembers your last choice for draft mode, on or off, as you work across tickets. The exception is when your admin has set draft mode to be on by default. In that case, you can turn draft mode off in a ticket, but it will be on again as you work across tickets.
In chat and messaging tickets, pressing the Enter key will not send the message or display the draft warning message. This enables you to compose your message without worrying about pressing enter and sending the message by mistake. To send the message in this situation, click send in the composer, then click Send when the draft warning message appears.
Keyboard shortcut for draft mode
You can use the following keyboard shortcut to toggle draft mode on and off.
Mac: Command+Option+t or Control+Option+t
Windows: Ctrl+Alt+t