Verified AI summary ◀▼
When an agent leaves your team, reassign their open tickets to maintain customer communication. Downgrade their role to end user to retain ticket information, but note that CSAT data and personal views are lost. Finally, suspend the account to prevent access. This process helps manage transitions smoothly and ensures continuity in customer support.
When an agent leaves your team, it's important to maintain your lines of communication with your customers. This article describes steps you should take for downgrading and removing an agent from Zendesk.
Watch the video below for more information on downgrading and removing agents.
How to demote or remove agents (1:46)
This article contains the following sections:
Related articles:
Reassigning an agent's tickets
It's recommended that you reassign an agent's tickets before they leave your team. Ideally, the agent will reassign their own tickets before leaving. If they can't, then an admin should reassign their tickets before removing the agent from the account. You can reassign open tickets only – that is, tickets that aren't in the closed state. The agent being removed remains the assignee of closed tickets.
If you don't reassign open tickets before the agent is removed, then the tickets are reassigned to the admin removing the agent. On Enterprise plans, this could also be an agent in a custom role with permission to manage group membership.
If the admin, or agent in a custom role with permission, removing the agent isn't a member of the group to which a ticket is assigned, then the ticket is reassigned to the first agent in the group. The first agent is the agent with the lowest user ID, based on when the agent account was created in Zendesk (the oldest active agent account).
If you have Auto-assign tickets upon solve activated in your account, any of the agent's solved tickets are assigned to the admin removing the agent. Additionally, if an admin has turned on solved ticket reassignment, a departing agent's solved tickets may be automatically reassigned based on the options selected.
To reassign an agent's tickets
- In Admin Center, click
 People in the sidebar, then select Team > Team members.
 - Select the agent.
- Click Manage in Support.
- On the Tickets tab in the Assigned tickets view, do one of the
following:
-
Manually reassign tickets one-by-one by opening each ticket, then selecting the agent you want to reassign the ticket to in the Assignee field.
- Bulk assign tickets by selecting the tickets' check boxes, then
click Edit(number) ticket(s).
Select the agent you want to reassign the tickets to in the Assignee field.
-
- Click Submit.
Downgrading an agent's role
Downgrade an agent's role to an end user before removing them from your account so you can maintain information about the tickets they handled.
- After you downgrade the agent's role, they will only be able to access tickets they are assigned to as the requester.
- CSAT data for the agent isn't retained. Review the Support dashboard and consider exporting agent-specific CSAT scores if needed.
- Any articles posted by the agent will continue to display the agent's name instead of a deleted user's name as the author.
- Aliases aren't preserved, but are replaced with their profile name.
- Agents' personal views and macros are deleted. Shared views and macros created by admins or agents with permission are not deleted.
- If the agent is a member of your Workforce management account, make sure to delete any schedules and shifts they're part of.
- If you remove the agent's seat after you downgrade the agent, it has an impact on the amount of data and file storage available in your account. See Default storage limits for details.
- Apps and integrations might fail if they were set up by an admin you're downgrading. Remember to update any app, integration, or API request that uses the admin credentials (Authentication for API requests). Another admin will need to reauthorize these apps before you downgrade the admin.
Before you downgrade an agent, be sure you've reassigned all of their tickets (see Reassigning an agent's tickets).
To downgrade an agent to an end user
- In Admin Center, click
People in the sidebar, then select Team > Team members.
- From the list, click the agent you want to downgrade.
- In the upper-right, click Manage in Support.
Alternatively, you can click Go to user profile under the list.
- On the agent's profile, set the User type to End user.
You'll see a warning screen that informs you of the privileges that will be lost by this user if you continue with the downgrade. Verify that this is what you want by selecting Yes, downgrade this user. Once you select this, your agent is no longer an agent and will no longer count towards your agent limit.
Explore users might experience issues with some reports when they downgrade an agent. Potential issues include:
- Reports that slice via user role can be affected, as the downgraded agent is now an end user.
- Report tabs with user filtering enabled will no longer show the downgraded agent in the drop-down.
If your Zendesk plan includes light agents, you may want to downgrade an agent to a light agent, then suspend them, to mitigate the impact on their Explore reports.
Suspend an agent's account
After you've reassigned the agent's tickets and downgraded the agent's role to end user, you can optionally suspend the agent's account to prevent the user from signing in to your help center. You can suspend an agent's account immediately after you've downgraded them.
If the user account of the dashboard owner has been deleted, any unshared dashboards they created cannot be recovered.
To suspend a user from your account
- In Support, click Customers
() in the sidebar.
- Click the name of the agent who was downgraded to an end user.
- Click the drop-down icon at the top right of the profile and select
Suspend.
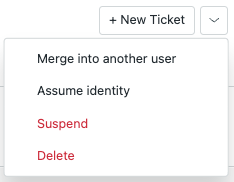
- Enter the reason for the suspension and select Suspend user.