Verified AI summary ◀▼
Connect your Salesforce organization to access customer data and tickets across both platforms. This integration helps sales teams view real-time support tickets and allows support agents to access CRM data while managing tickets. Configure features like ticket views and data syncs to enhance customer interactions. Ensure proper admin permissions and session settings for a smooth setup and operation.
The Zendesk for Salesforce integration provides a seamless connection between your Salesforce organization and your Zendesk instance, allowing your sales and support teams to access tickets and customer data within their respective applications.
The integration provides a comprehensive view of customer accounts, eliminating the need to switch systems or reconcile data. For example, sales representatives can access real-time support tickets in Salesforce, enhancing their outreach strategies. Similarly, support agents can view essential customer data from Salesforce while managing tickets in Zendesk, ensuring a thorough understanding of customer needs.
To use the integration, first connect your Salesforce organization to Zendesk, as described in this article. Then, configure the integration based on how you want to use it.
Watch the video below to learn more about connecting and using the Zendesk for Salesforce integration.
Salesforce integration: Get a unified view across sales and service (3:59)
Related topics:
Understanding the different ways to use the integration
After you’ve connected your Salesforce organization to Zendesk, the integration will require additional configuration, depending on how you plan to use it.
Share Zendesk data with sales teams in Salesforce
Providing sales representatives with access to Zendesk data can significantly enhance customer interactions. Consider setting up the following features:
- Create a ticket view in Salesforce to give sales representatives real-time ticket access from Salesforce account, contact, and lead pages. See Setting up ticket view in Salesforce.
- Sync Zendesk ticket data to Salesforce case fields, allowing for comprehensive reporting and custom workflows within Salesforce. See Setting up ticket sync from Zendesk to Salesforce.
Equip support teams with CRM data
Enable customer service agents to access essential CRM data while handling tickets in Zendesk. Consider setting up the following features:
- Sync Salesforce data to Zendesk Support. Automatically update Zendesk users and organizations with relevant Salesforce data, allowing for triggers and actions based on this data. See Configuring data sync from Salesforce to Zendesk.
- Turn on and configure the Salesforce app for Zendesk Support. The app allows agents to see customer information from Salesforce directly in the sidebar of an existing Zendesk Support ticket.
Considerations
- The Zendesk for Salesforce integration is available if you use any of these Salesforce editions: Performance, Unlimited, Enterprise, or Developer Edition (or other editions with Salesforce API rights, such as Professional with the API add-on).
- The integration will work in both Salesforce Lightning and Classic. However, this article only provides instructions for Lightning, the newer interface that Salesforce recommends.
- You must be a Zendesk Support administrator and Salesforce administrator to set up your integration. If you can't use the System Administrator profile in Salesforce, a user with the required profile permissions can connect the integration. You can't use an API-only Salesforce user to connect the integration.
- If the Zendesk or Salesforce admin who connected the integration has their role downgraded, the integration will cease to function. It will require the integration to be disconnected, then reconnected in Admin Center by another admin.
- Before initially connecting the integration, the Proof Key for Code Exchange (PKCE) setting must be disabled within the Salesforce OAuth and OpenID Connect settings. After the integration is connected, the PKCE setting must remain disabled. If you re-enable the setting, the integration will fail at some point in the future because its connection will not refresh.
- Permissions for viewing tickets in ticket view are based on the permissions of the admin user who initially connected the integration. Permissions for creating and editing tickets in ticket view are based on the permissions of the linked Zendesk agent.
Connecting your Salesforce organization
Connecting a Salesforce organization to Zendesk is a two-step process:
Checking your Salesforce session settings
The integration requires your Salesforce session settings not to be locked to an IP address. If your session settings remain locked, your integration will be disconnected once a session expires.
To unlock Salesforce sessions from an IP address
- Log in to your Salesforce organization.
- Click the cog icon (
 ) in the upper right pane, then click
Setup.
) in the upper right pane, then click
Setup. - In the left navigation pane under SETTINGS > Security, select Session Settings.
- Deselect the Lock sessions to the IP address from which they
originated checkbox.

Connecting Salesforce to Zendesk
Set up and configure your integration in Admin Center. You should test the integration with your Zendesk and Salesforce sandbox environments first.
- If you plan to use the Salesforce app for Zendesk Support, connecting multiple Salesforce organizations to a Zendesk instance allows agents to view Salesforce data for all your organizations in the sidebar of a ticket.
- When a Zendesk ticket view is added to your Salesforce pages, your sales representatives can view tickets for all Zendesk accounts connected to the organization.
To connect Salesforce to Zendesk
- In Admin Center, click
 Apps and integrations in the sidebar, then select Integrations >
Integrations.
Apps and integrations in the sidebar, then select Integrations >
Integrations. - On the Integrations page, click Salesforce.
- If you already have connections set up, they display in the connections list. To add another connection, click Add connection.
- Select the Salesforce instance to set up the integration:
Production or Sandbox.

- Select the checkbox to agree to the Built by Zendesk Terms of
Use, then click Connect Salesforce.
You are directed to a Salesforce sign-in page.
- Sign in to Salesforce using admin credentials.
You are directed back to Admin Center. The new connection displays in the Salesforce connections list, but all features will remain inactive.
Salesforce and Zendesk are now connected. Next, click the options menu icon
(![]() ) next to the salesforce organization and click
Configure to configure the integration, depending on how you plan to
use it. See Understanding the
different ways to use the integration.
) next to the salesforce organization and click
Configure to configure the integration, depending on how you plan to
use it. See Understanding the
different ways to use the integration.
Viewing and editing your connections
Use the Integrations page in Admin Center to view and edit your Salesforce connections with Zendesk. You can also rename your connections to help identify them.
To view or edit your Salesforce connections
- In Admin Center, click
Apps and integrations in the sidebar, then select Integrations >
Integrations.
- On the Integrations page, click Salesforce.
The connections appear in a list. Each connection displays which features are active: Ticket view in Salesforce, Data sync, or the Support app in Zendesk.
- To edit the connection name or view details, click the options menu icon (
 ) for that connection, then click Edit.
- View the connection details, or type a new name for the connection in the
Organization name field.
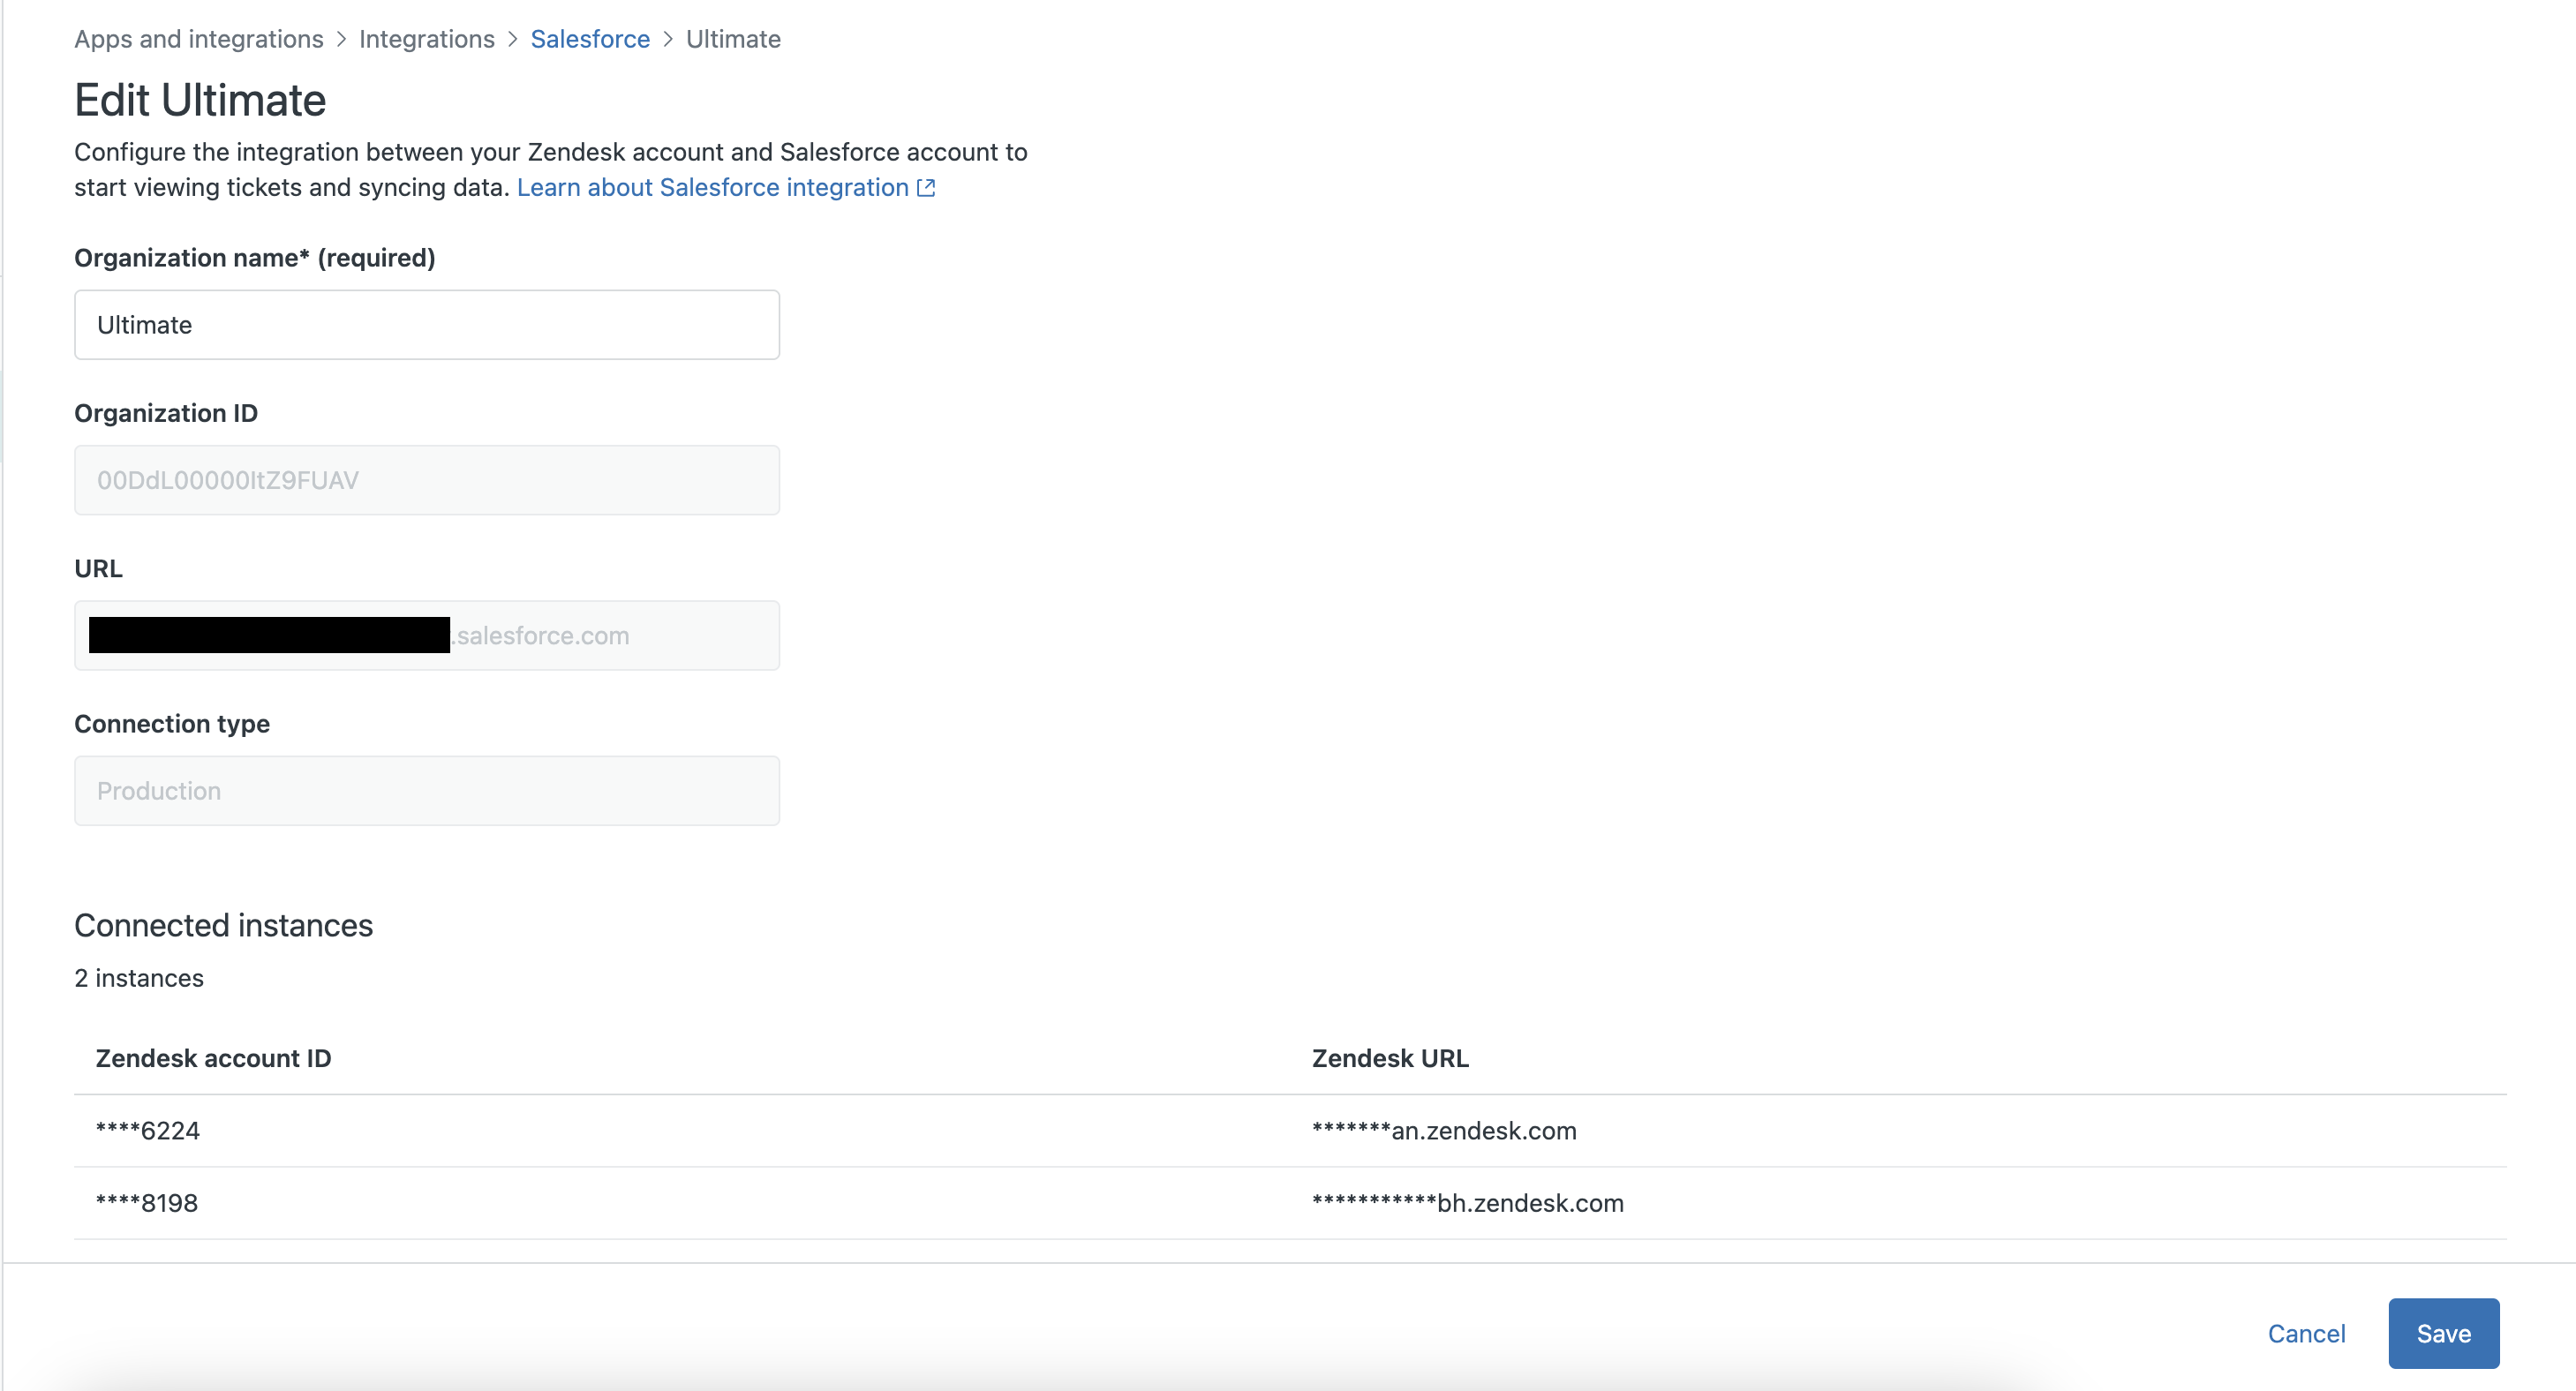
- Click Save.
Disconnecting your Salesforce organization
Your Salesforce organization can be disconnected in Admin Center. Once disconnected, your configuration settings are still retained if you decide to connect to the same organization.
- In Admin Center, click
Apps and integrations in the sidebar, then select Integrations >
Integrations.
- On the Integrations page, click Salesforce.
- Click the options menu icon () next to the Salesforce organization you want
to disconnect, then click Disconnect.