Verified AI summary ◀▼
Manage custom user fields to store extra customer details. Admins and agents with permissions can create, edit, and manage these fields. On Enterprise plans, set view permissions for specific roles. Deactivate fields to hide them temporarily or delete them to remove them permanently. Remember, deleted fields can't be recovered, but data persists as tags if linked to dropdowns or checkboxes.
As described in Adding custom fields to users, custom user fields allow you to store additional customer details in Zendesk. Admins and agents in custom roles with permission can create, edit, and manage any custom user fields.
On Enterprise plans and above, custom user fields are visible to agents based on their custom role. In addition, agents must have the Manage user fields permission enabled for their role to edit end user fields.
On all other plans, custom user fields are visible to all agents. Only agents with access to all tickets can edit custom user fields for end users. They can also edit these fields for themselves, but not other agents.
End users can’t see or edit custom user fields.
Editing custom user fields
Everything about a custom field is editable except the field type and key, which can't be changed after the custom field is created.
To edit a custom user field
- In Admin Center, click
 People in the sidebar, then select Configuration > User fields.
 - Hover over the row of the field you want to edit, then click the option menu
icon (
 ) and select Edit.
 - Edit the settings as needed, and click Save.
Setting view permissions for custom user fields (Enterprise plans only)
Customers on Enterprise plans and above can restrict the visibility of custom user fields to agents in specific custom roles.
Note the following limitations when setting view permissions:
- If your account has more than 100 custom user fields, you must delete excess fields (including inactive fields) before you can apply these permissions.
- Agents must be assigned a custom role to be granted granular view access. Legacy agents (agents without a custom role assigned to them) will have access to fields that agents in all roles can view on the account.
- Permissions around viewing custom user fields are not automatically honored in Explore. To restrict access to Explore, use the custom role permissions for each agent role.
- Triggers may run that automatically add tags to end-user records. Since tags don’t have permissions, these triggers may expose sensitive information. Review your triggers with tagging actions.
- The trigger configuration user interface and API may reveal values of user custom fields, specifically, dropdown and multi-select field types.
- Business rules configuration pages may allow you to set conditions that reference custom user field values.
- Placeholders may still expose custom user fields regardless of permissions.
- When a dropdown, multi-select, or checkbox is being created/updated, tags can expose custom user field values. You can turn off ticket tags if you’d like.
To set view permissions for a custom user field
- In Admin Center, click
People in the sidebar, then select Configuration > User fields.
- Hover over the row of the field you want to edit, then click the option menu
icon () and select Edit.
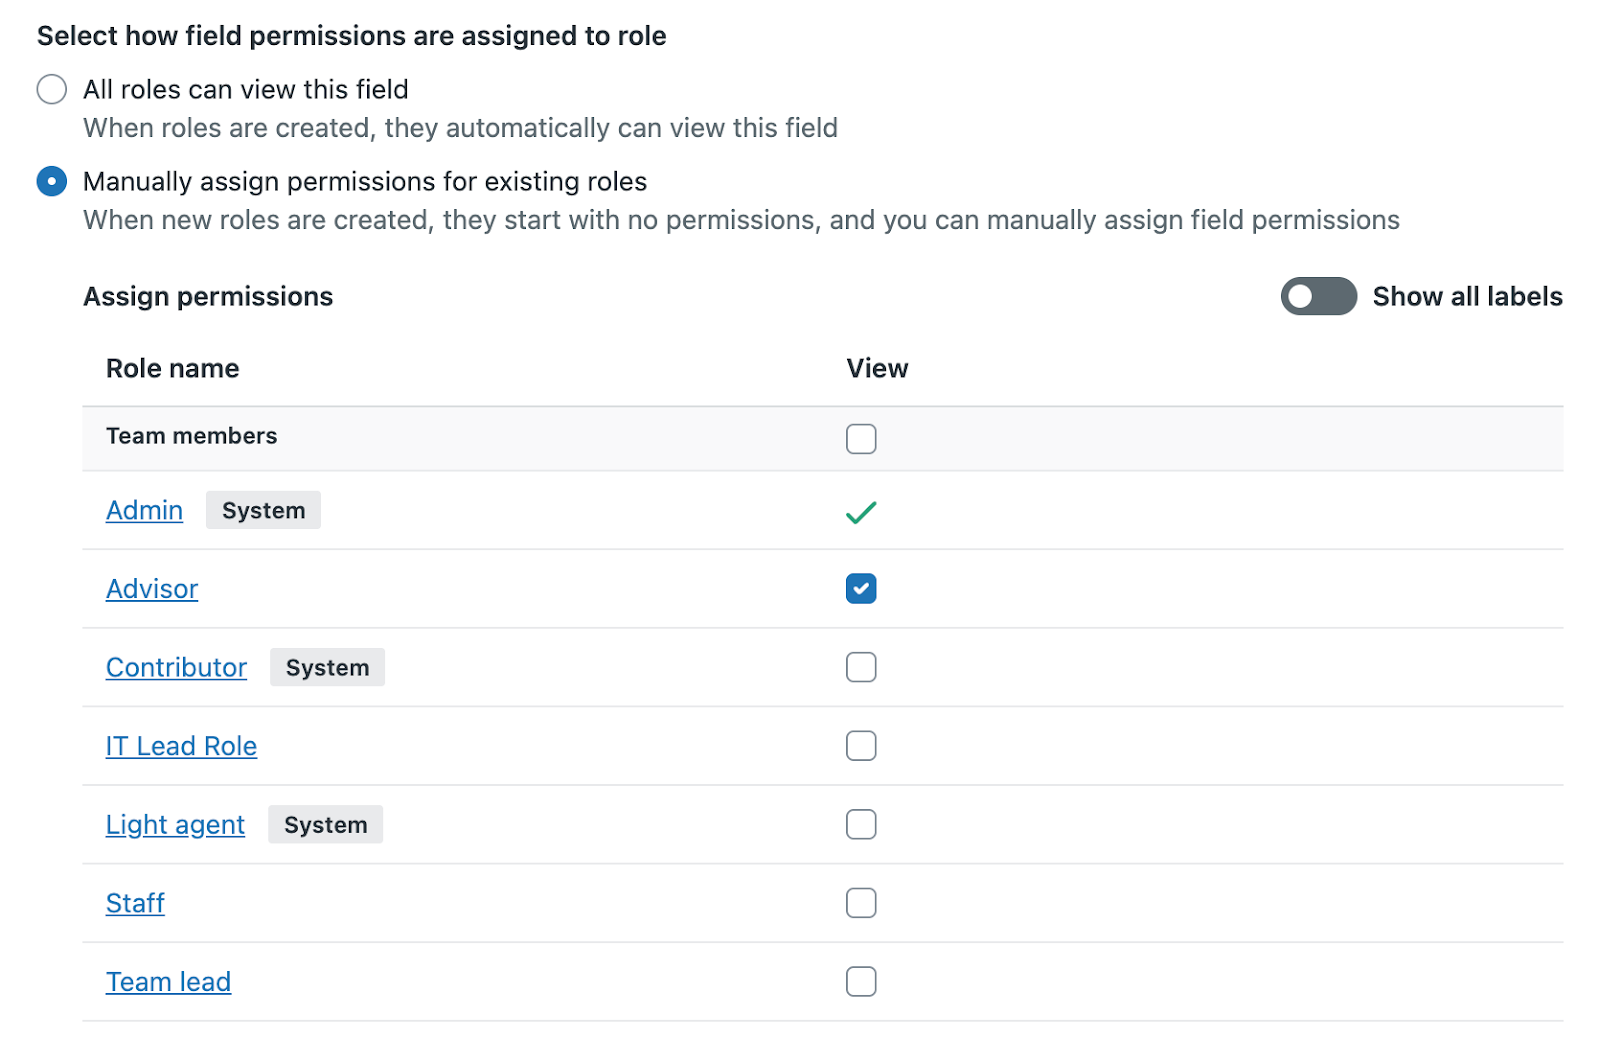
- Select an option for Select how field permissions are assigned to
role:
- Select All roles can view this field to make the field visible to agents in all custom roles.
- Select Manually assign permissions for existing roles to make the field visible to agents in select custom roles. Then, select the View check box for each role to give agents in that role view permissions.
- Click Save.
Deactivating and reactivating custom user fields
You can set custom user fields to be active or inactive. Inactive fields are hidden in the user profile view and customer context panel. New custom user fields are active by default.
- In Admin Center, click
People in the sidebar, then select Configuration > User fields.
- Find the custom user field, then click the option menu icon (), and select Deactivate.
Deactivating a custom user field removes it from the user profile view, but the field can be reactivated at any time.
- Click Deactivate to confirm you want to deactivate the custom field.
To reactivate a custom user field
- In Admin Center, click
People in the sidebar, then select Configuration > User fields.
- Find the custom user field, then click the option menu icon (), and select Activate.
Deleting custom user fields
You can delete custom user fields on the edit page. Deleting a custom user field is permanent. The field and data stored in that field can't be recovered.
- In Admin Center, click
People in the sidebar, then select Configuration > User fields.
- Hover over the row of the field you want to edit, then click the option menu
icon () and select Edit.
- Click the Actions menu at the top of the page, then click
Delete.
When you delete a custom user field, that field and any associated data are removed from all users. The data is preserved only if the custom field also adds a tag to a user. The two custom fields that add tags are the drop-down list and the checkbox. If you delete one of these custom fields, then the data in users persists as tags.
- Click Delete to confirm that you want to delete the custom user field.