Ticket layouts control the look and feel of the ticket interface. Admins can create custom layouts to support different ticket workflows for agents. You must have a Professional plan or above to create custom layouts.
Custom layouts with layout builder go beyond ticket forms by allowing you to specify which components are included in a ticket and control the location of where the components appear. Components include ticket conversations, ticket properties (fields), customer context, third party apps, and more.
This article provides an overview of how you can use layout builder to create custom layouts and improve agent efficiency. You must have the Zendesk Agent Workspace activated to create and manage custom layouts.
This article contains the following sections:
- About Support ticket layouts
- About layout builder
- About contextual workspaces
- Plan requirements for custom layouts
Related articles
About Support ticket layouts
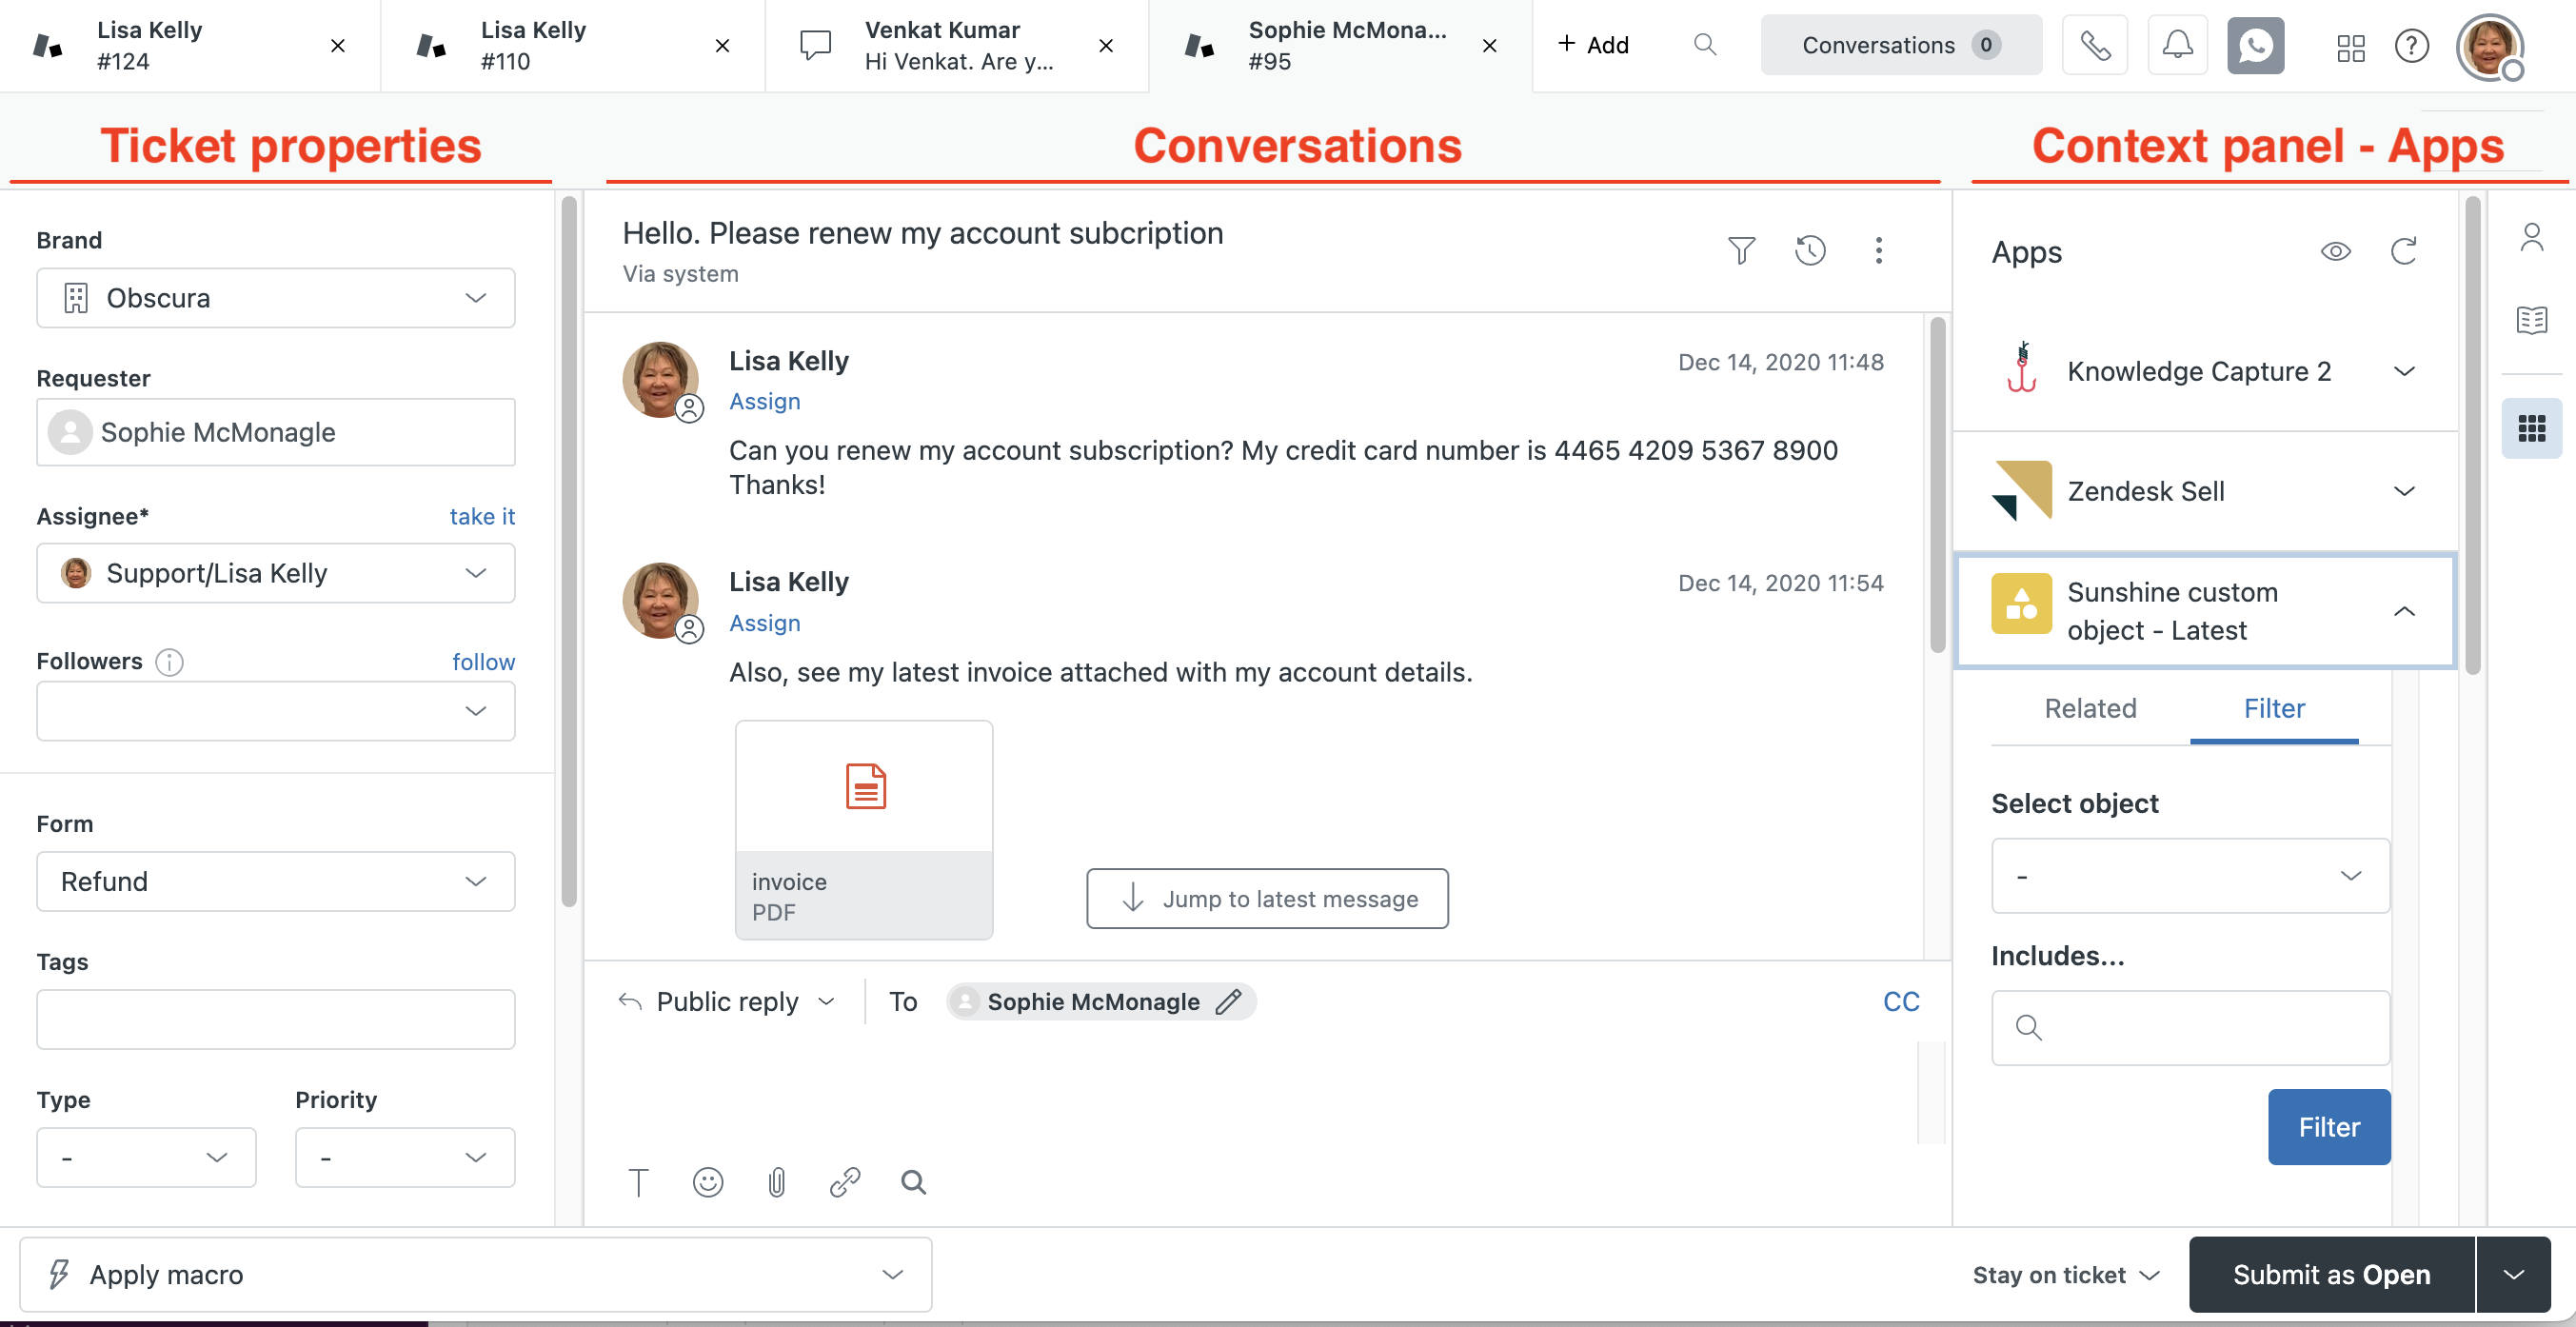
By default, the Zendesk Agent Workspace includes a standard Support ticket layout that provides the framework for the basic components of a ticket. This layout includes ticket properties (fields) on the left side of the ticket, ticket conversations in the middle, and a context panel on the right.
Standard ticket layout

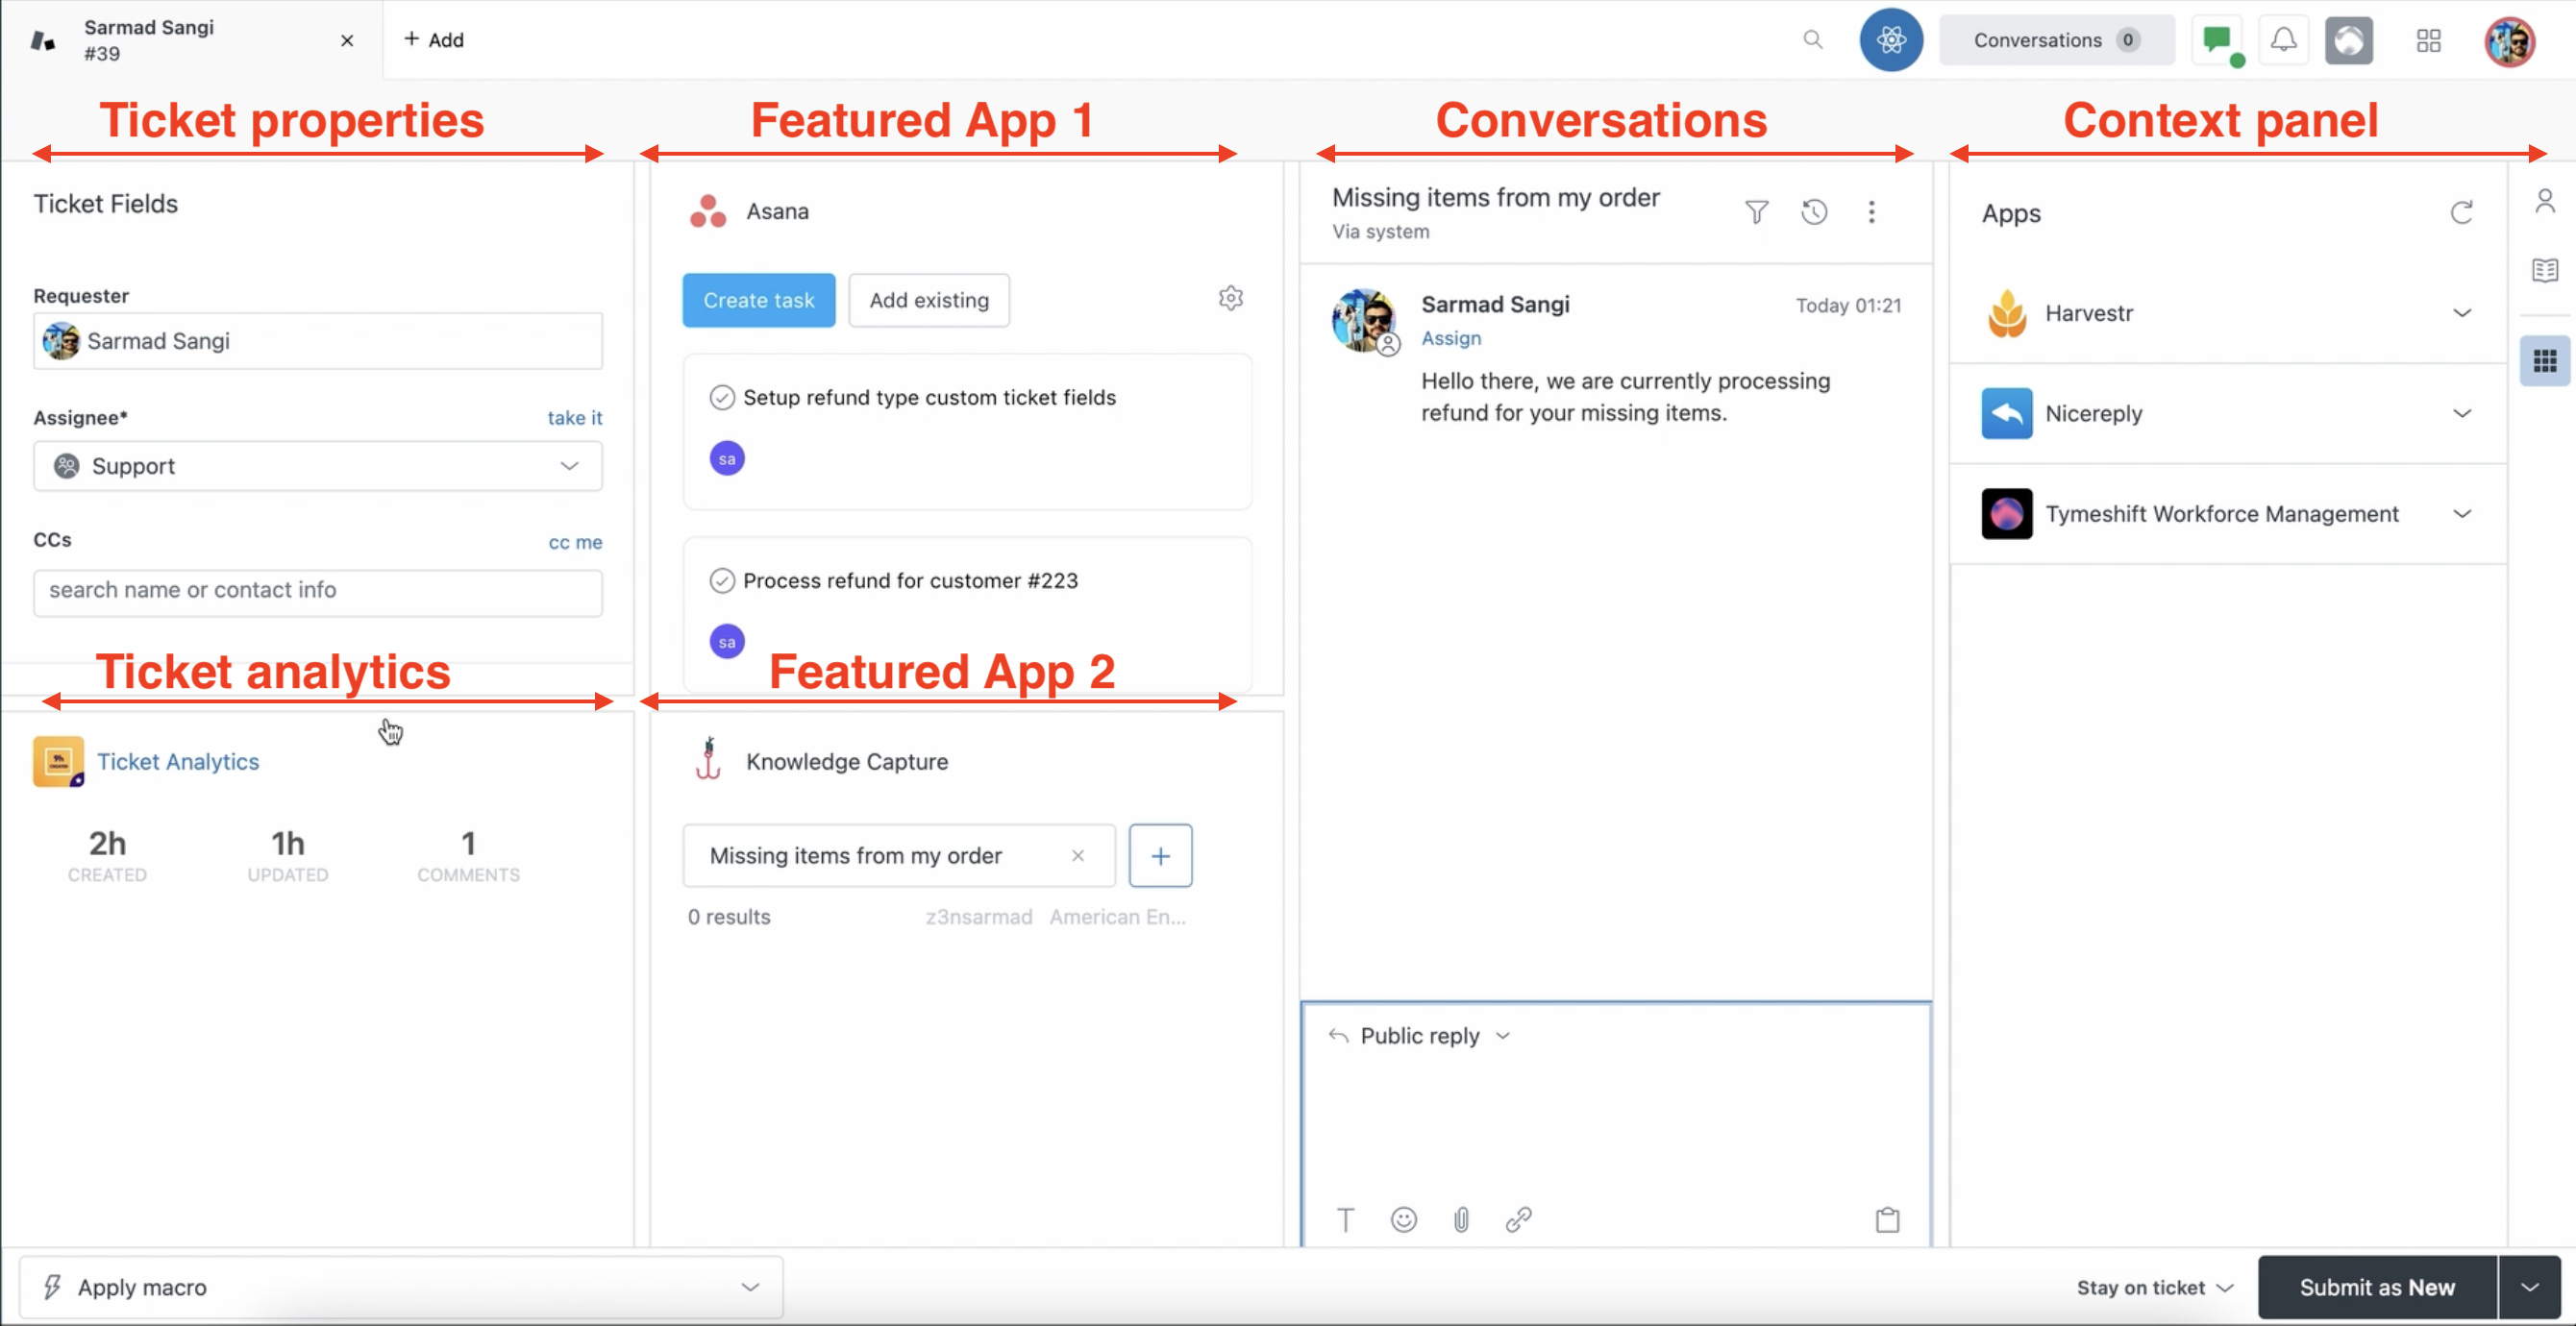
With layout builder, you can use an intuitive layout interface to create and apply custom layouts to the ticket interface. You can rearrange ticket components within the ticket framework, add new components, and change component sizing. You can also control what data appears in a ticket component and change the ticket conversation flow.
Example custom layout

You can create and save multiple layouts in your account and use them for different situations. For example:
- You can control which apps appear in the context panel and change the order in which they appear.
- If your agents work with a lot of custom applications, you may prefer to move popular apps out of the context panel and into the middle of the ticket interface, so they are easier to access.
- If your agents spend a lot of time managing ticket properties, you can move ticket properties nearer to the context panel.
- You could create a custom ticket layout for Returns that includes Apps specifically created to help agents manage returns.
You will be able to apply a custom layout based on certain ticket conditions or even use one as the default ticket layout for your account. You can create up to 20 custom layouts for your account.
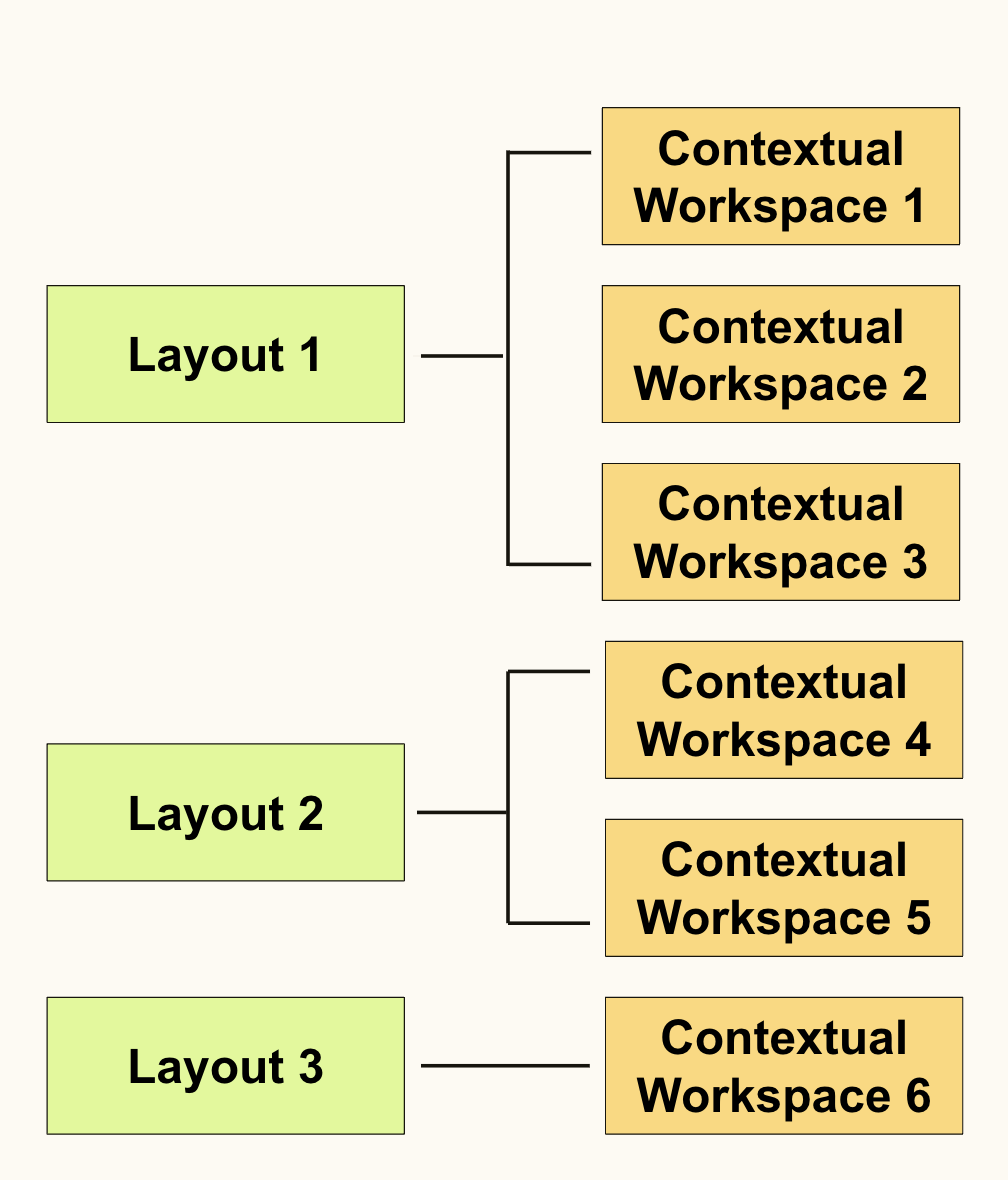
Customers with Enterprise plans can have more than one custom layout active at a time and use them with contextual workspaces. Customers with Professional plans can have one active custom layout and apply it to the default ticket layout.
Changes you make to a ticket layout do not prevent agents from resizing the context panel or the ticket properties panel when they work on tickets.
About layout builder
Custom layouts are created using an intuitive layout builder with access to predefined layouts and a drag-and-drop component library. Layout builder enables you to pick which components to include in a ticket, then you can arrange and resize them. You have the power to create the exact layout you need.
Layout builder includes a canvas on the left for arranging and resizing components and a component library on the right for adding components. Layout builder enables you to customize both the main ticket interface and the context panel. For more information, see Creating custom layouts to improve agent workflow.

About contextual workspaces
On Enterprise plans, you can use contextual workspaces to control which custom layouts your agents see. Contextual workspaces enable you to create customized ticket workflows based on a series of conditions. Working in conjunction with your contextual workspaces, you can dictate which custom layout to use based on the product brands, agent groups, and ticket forms that you define in a contextual workspace.
Once you create a custom layout, you can assign it to a conditional workspace. This enables the workspace and the layout to work together to make sure your agents see the right ticket layouts at the right times. For more information on contextual workspaces, see Setting up contextual workspaces.

When you first create a ticket, the standard ticket layout is used no matter what default layout or contextual workspace is configured for the ticket. Relevant forms, macros, and apps will be applied to a new, unsaved ticket if fields used in the contextual workspace have default values. Custom layouts and knowledge filters won't be applied until you submit and reopen the ticket.
Plan requirements for custom layouts
Custom layouts are available in Professional plans and above. The majority of custom layout features are supported on both Enterprise and Professional plans, For example, both plans have full access to layout builder and both plans can configure the conversation flow and composer location in tickets.
There are some restrictions on Professional plans that don’t exist on Enterprise plans. The restrictions occur because contextual workspaces are not available on Professional plans.
-
Enterprise and Professional plans can create up to 20 layouts.
-
Enterprise plans can use contextual workspaces to have multiple layouts active at the same time.
-
Professional plans can have only one active layout, set as the default ticket layout.